Sage may be a giant of business management, but the stripped-down Sage Accounting application gives many small business owners just what they need to manage their finances. Unfortunately, those who wish to move their Sage Accounting data into intelligence tools like Power BI will find the application is drastically under-supported due to its low-priority within the canon of dashboarding apps. In general, you have two options: create your own app for Sage accounting in Power BI, or use a third party platform to integrate them.
Create Your Own App
One of the benefits of Power BI is that users have a lot of control over making changes to their dashboard and adding applications wherever needed. Applications allow users to integrate data from outside sources without needing to manually upload the data.
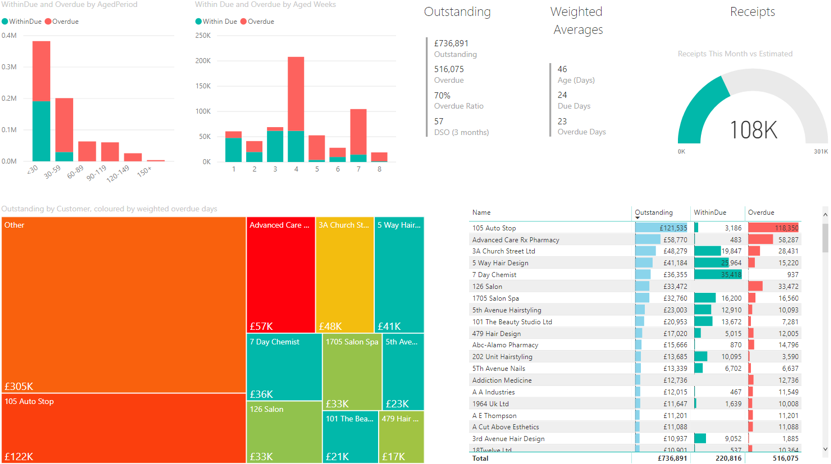
(image source: accountinginsights.co.uk)
Microsoft documentation contains a wealth of information about creating applications in Power BI. That said, we're not going to lie to you: through all of our research, we still couldn't quite figure out how to do it. If you have a lot of time on your hands (and ideally, some programming experience), this might work for you. However, for most people, this option is probably not going to be worth it and will not give you a satisfying end product. We suggest the second option:
Third-Party Integration Platform: Dataddo
Dataddo is one of the few integration platforms that provides the connection from Sage Accounting to Power BI “off-the-shelf,” ready for immediate use. This rest of this article will cover the specific steps for creating the integration on the Dataddo platform, and we highly recommend bookmarking it for future reference!
Step 1: Add the data source
Starting from the Dataddo control panel, you will first make a data connection to your Sage account so that Dataddo can extract the data. Go to the Sources page and click “New source” in the top right corner.
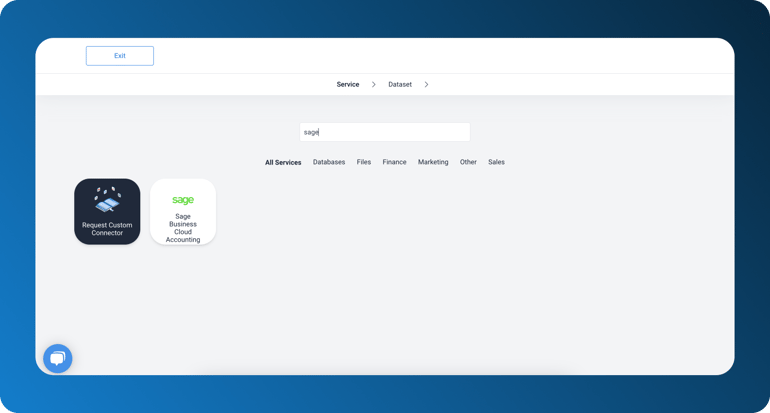
Type “Sage” into the search box and click the icon for Sage Accounting.
Step 2: Configure the data
Choose the data set you want to work with. In this example, we will use “Contacts.” In case you need to use multiple data sets, you’ll create multiple data sources, one for each set.
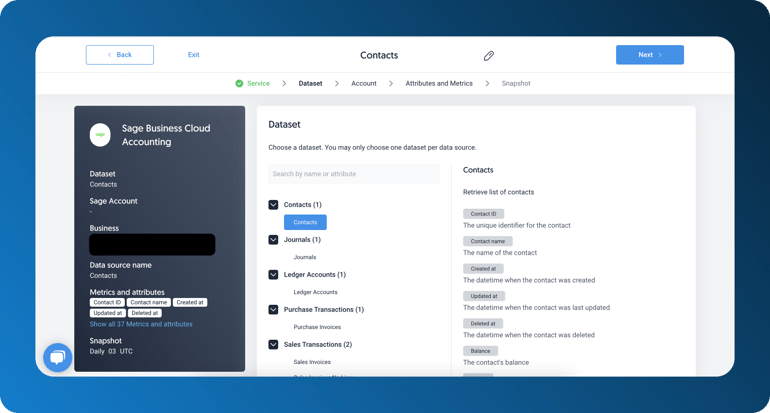
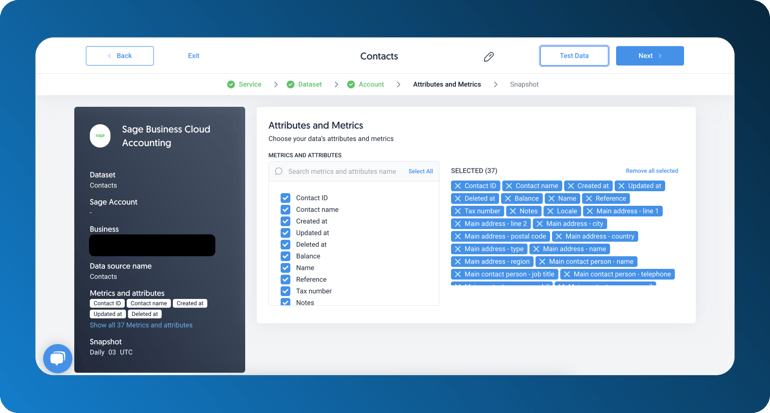
Input the email for your Sage account, and after hitting “next,” select the specific attributes of that data set that you want to see in Power BI. I don’t need all of these attributes, so I’ll only select those relevant to my needs, as below. It is optional to rename the data source, if needed. Next page-
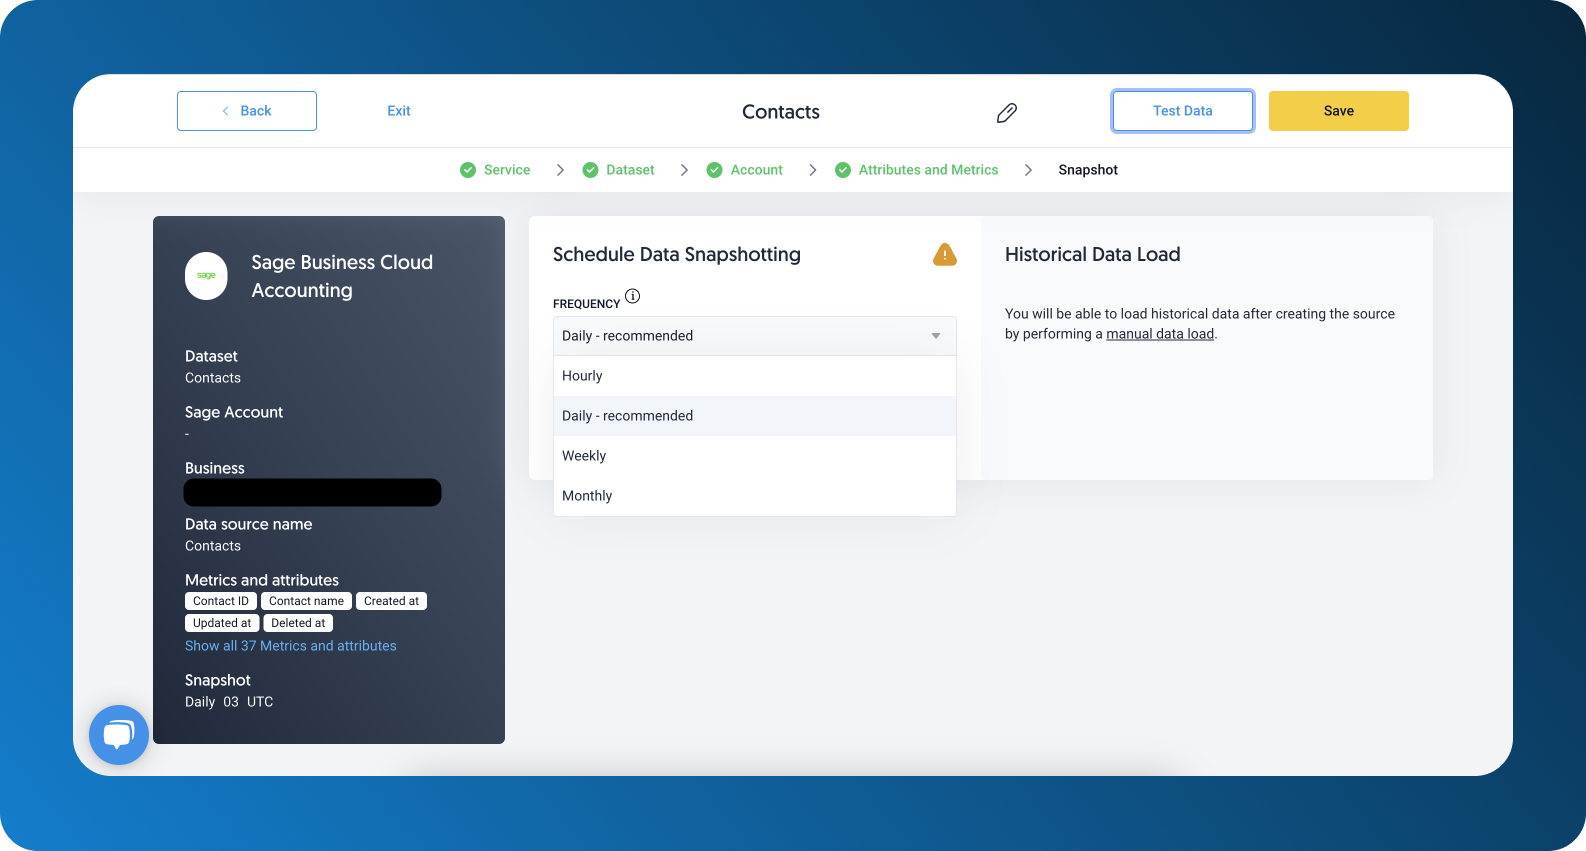
Finally is the “Snapshotting” page. Snapshotting refers to how often Dataddo will take “snapshots” of the Sage data to load into Power BI. Choose the date range of data you want gathered at each data sync (today’s data, yesterday’s data, etc), as well as the frequency of the snapshot, exact time, and how you want Dataddo to handle previous data syncs.
Step 4: Create the data flow to Power BI
Now set up the data connection within your Power BI account. After creating the data source, go to the “Flows” page. On the left, add your newly created source. On the right, select Power BI. Label your data flow and hit “Create Flow.” 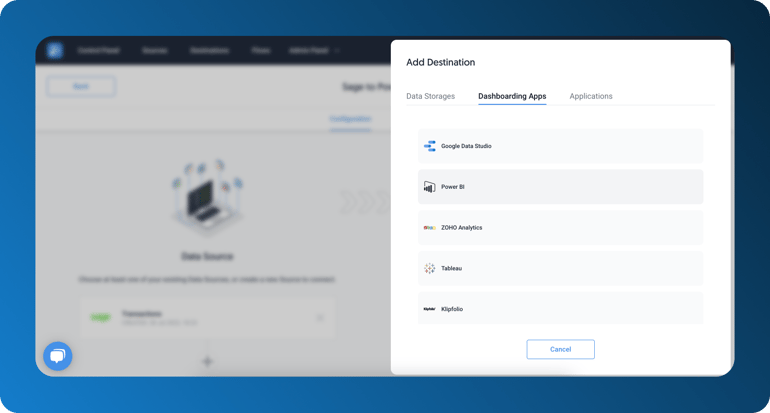
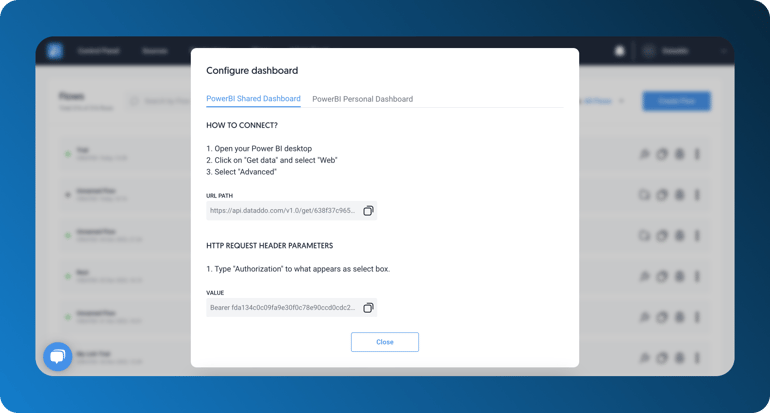
The Configure Dashboard pop-up will appear. These are instructions for connecting to Dataddo in your Power BI account using the Dataddo API and HTTP Request Value provided.
Step 5: Get your data!
Just like that, you’ve created the flow from Sage Accounting to your Power BI account! Dataddo will keep the connection live, syncing at the time period specified in “snapshotting,” so it won’t be necessary to fiddle with the pipeline unless you decide to change the parameters.
Remember, the Dataddo support team is always available in case of technical trouble or questions setting up a data flow. Feel free to reach out at support@dataddo.com.
Why choose Dataddo?
There are few things more important to the growth of your business than financial data and being able to analyze it. Third-party data management platforms like Dataddo are the missing link between collecting vital data and putting it to use. Dataddo can provide the flexibility you want, and the ease you crave, at the price you’ve been searching for. Start your 14 day free trial today!
|
Connect Sage Account to Power BI for FREE Just a few quick steps to get your Sage data to your dashboard for better analysis, without the hassle. |
Additional Power BI Tips, Tricks, and Resources
Continue reading the Dataddo blog for more Power BI tips, tricks, and resources!
- Smarter Financial Dashboards for SMEs (with Free Power BI Template)
- Overcome Data Blending Limitations of Tableau, Looker, Power BI
- Guide to Slicers in Power BI: Create Better-Looking Reports
- How to Connect NetSuite to Power BI: ODBC vs. Dataddo
- How to Connect Google Sheets with Power BI: Direct vs. Dataddo
- How to Connect Stripe to Power BI: Direct vs. Dataddo
- Facebook Ads Dashboard Using Dataddo and Power BI
- How to connect JSON with Power BI: Direct vs. Dataddo
- How to Connect SEMrush to Power BI for FREE
- How to Connect Xero to Power BI With Dataddo for Free
- Connecting Xero to Power BI: Native or Third-Party Connector?
- How to Integrate Exact Online Data with Power BI (or any BI Tool)
- Power BI vs Tableau: The Breakdown




Comments