

Looker Studio is great for data visualization and offers some transformation capability via in-built functions, but it is unable to perform advanced data manipulations such as data joining. Although it does offer data blending functionality, the functionality is rather difficult to set up and debug.
Here is a workaround using Dataddo, which allows users to easily and without coding perform various joining operations (e.g. left join, right join, inner join) before sending data to Looker Studio. This gives users much more visualization flexibility.
Want more Looker Studio tips & tricks?
- Learn how to work with multiple date ranges.
- Get 3 free dashboard templates for beginners.
- Find out how to track your Instagram follower count.
- Learn how to calculate weighted averages.
Step 1. Log into the Dataddo platform and click on Flows at the top of the page.
- NOTE: If you don't have an account, sign up for a 14-day free trial.
Step 2. Click on Create Flow in the top right corner.
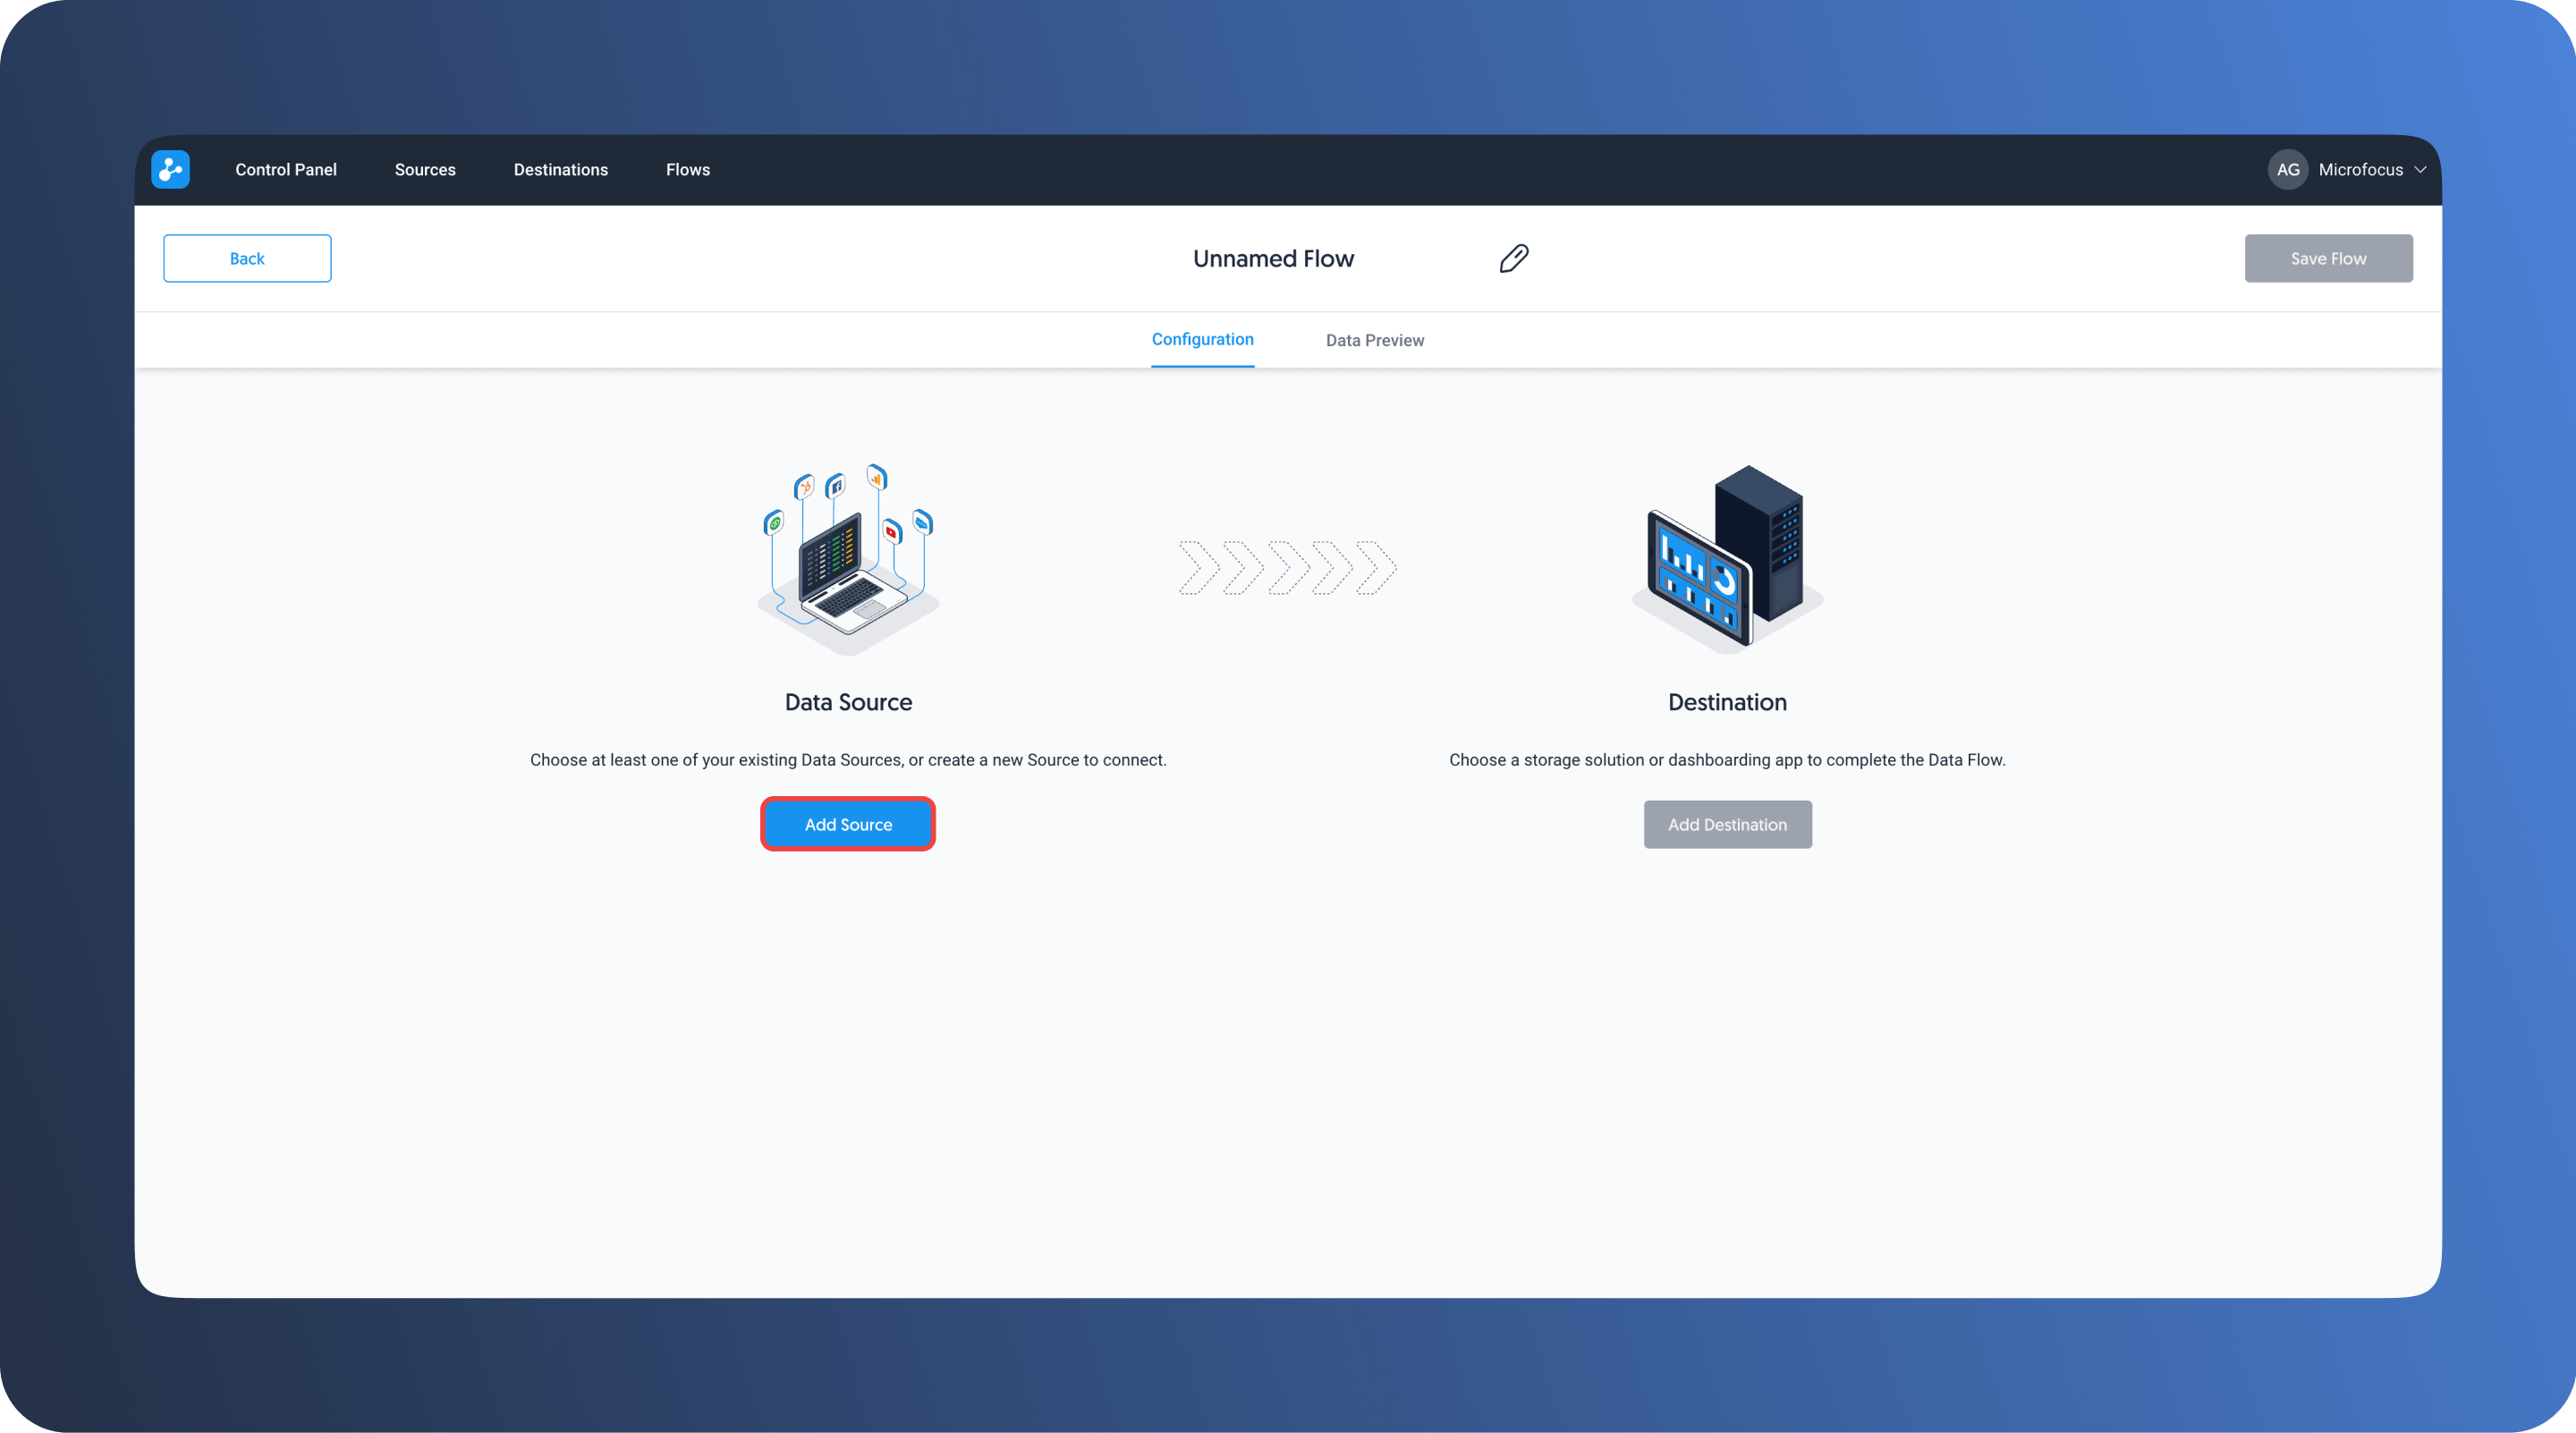
Step 3. Click on Add Source to connect it to the destination. You can type the connector's name into the search bar to find it faster.
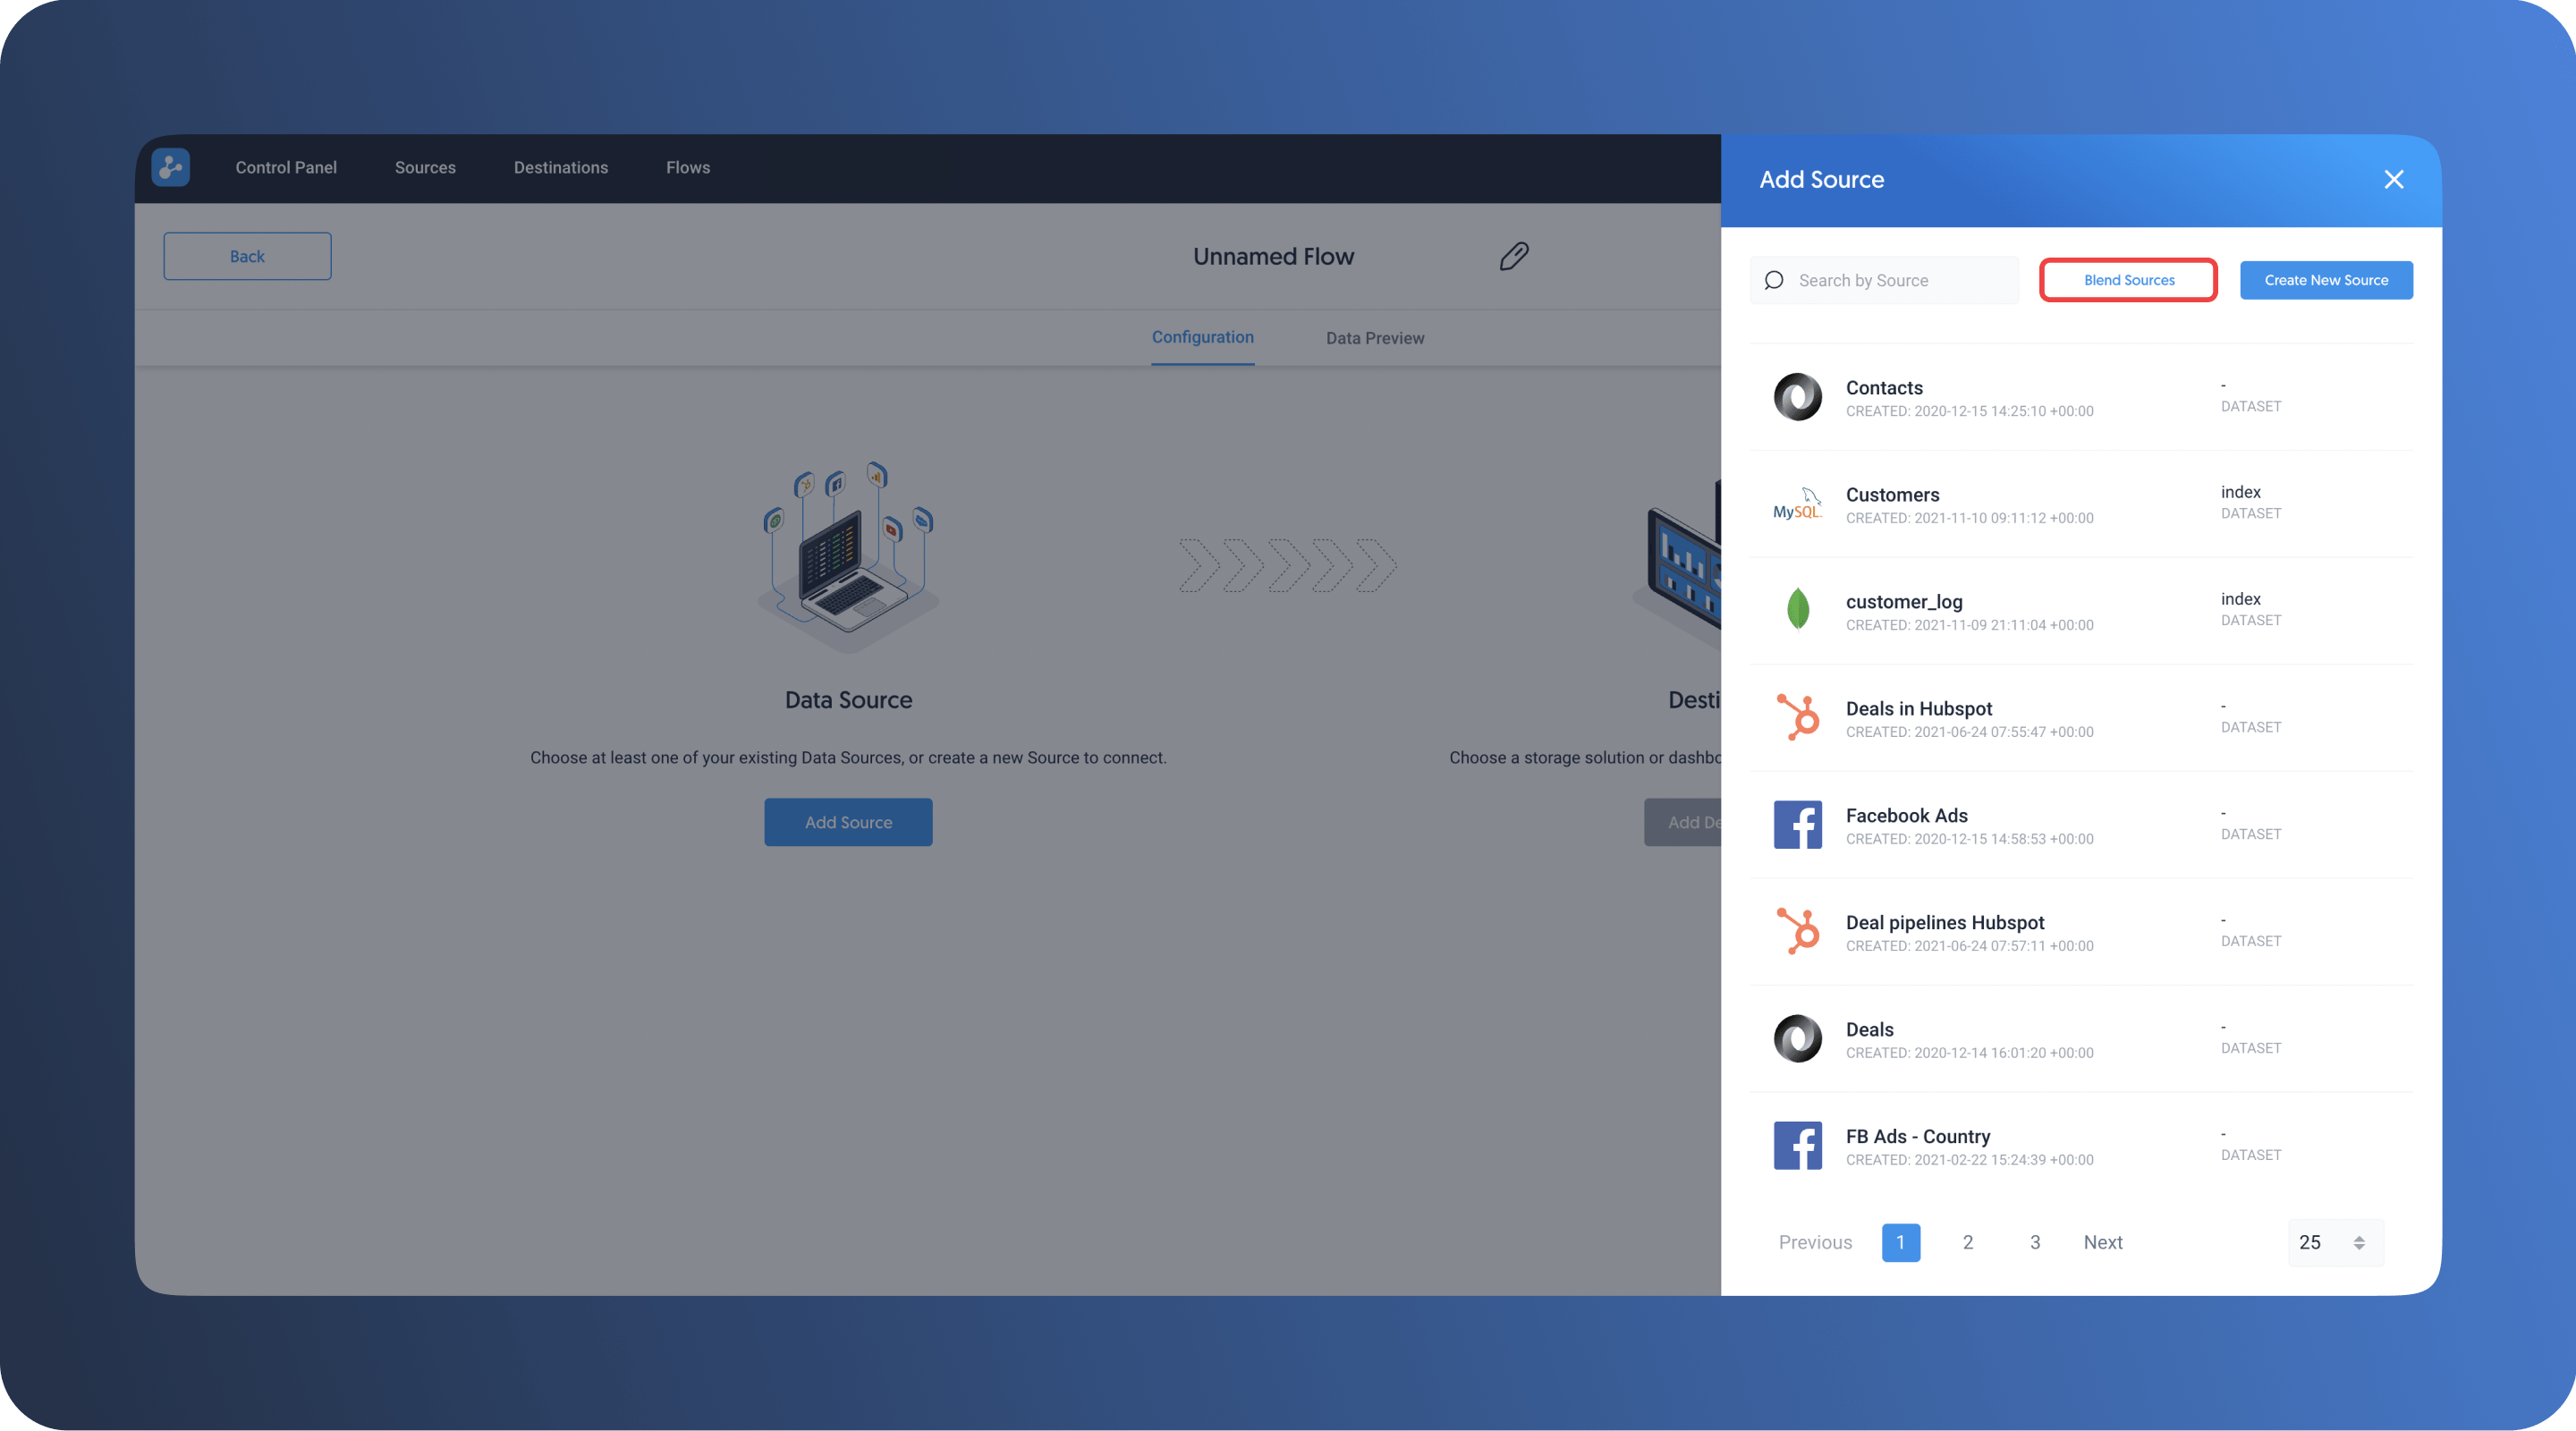
Step 4. Click on Blend Sources.
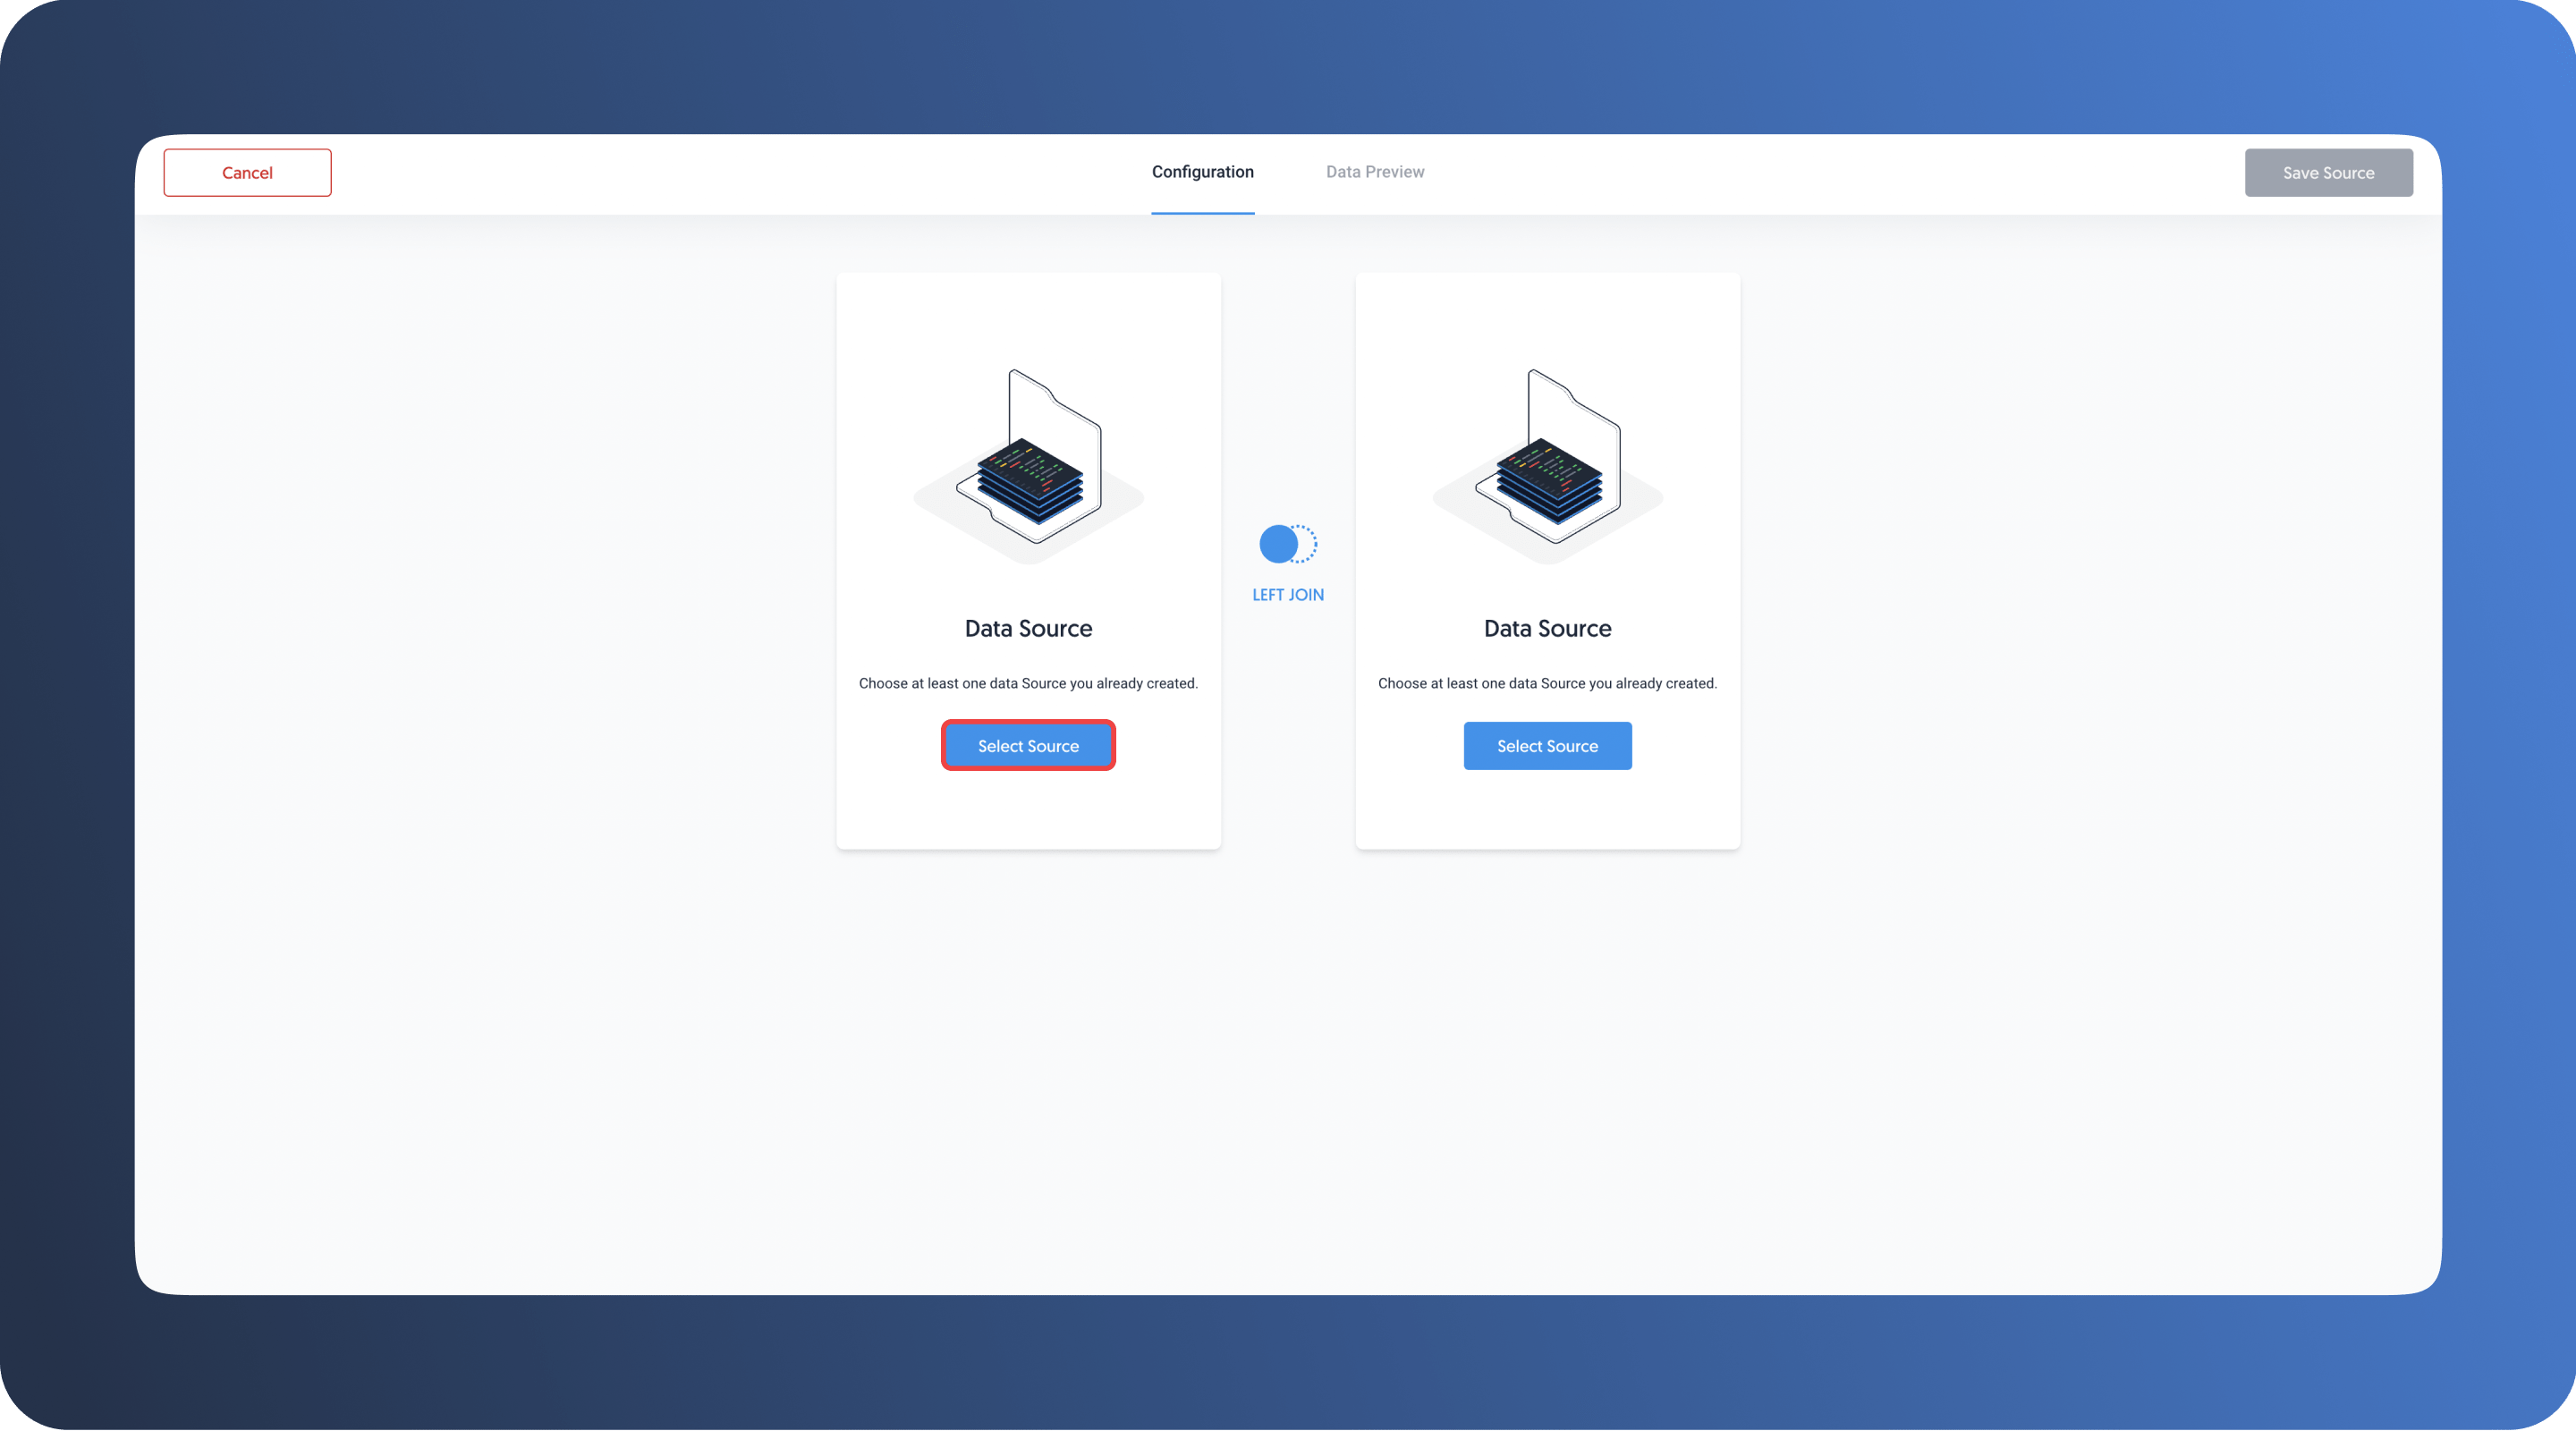
Step 5. Click on Select Source to choose the sources you wish to blend.
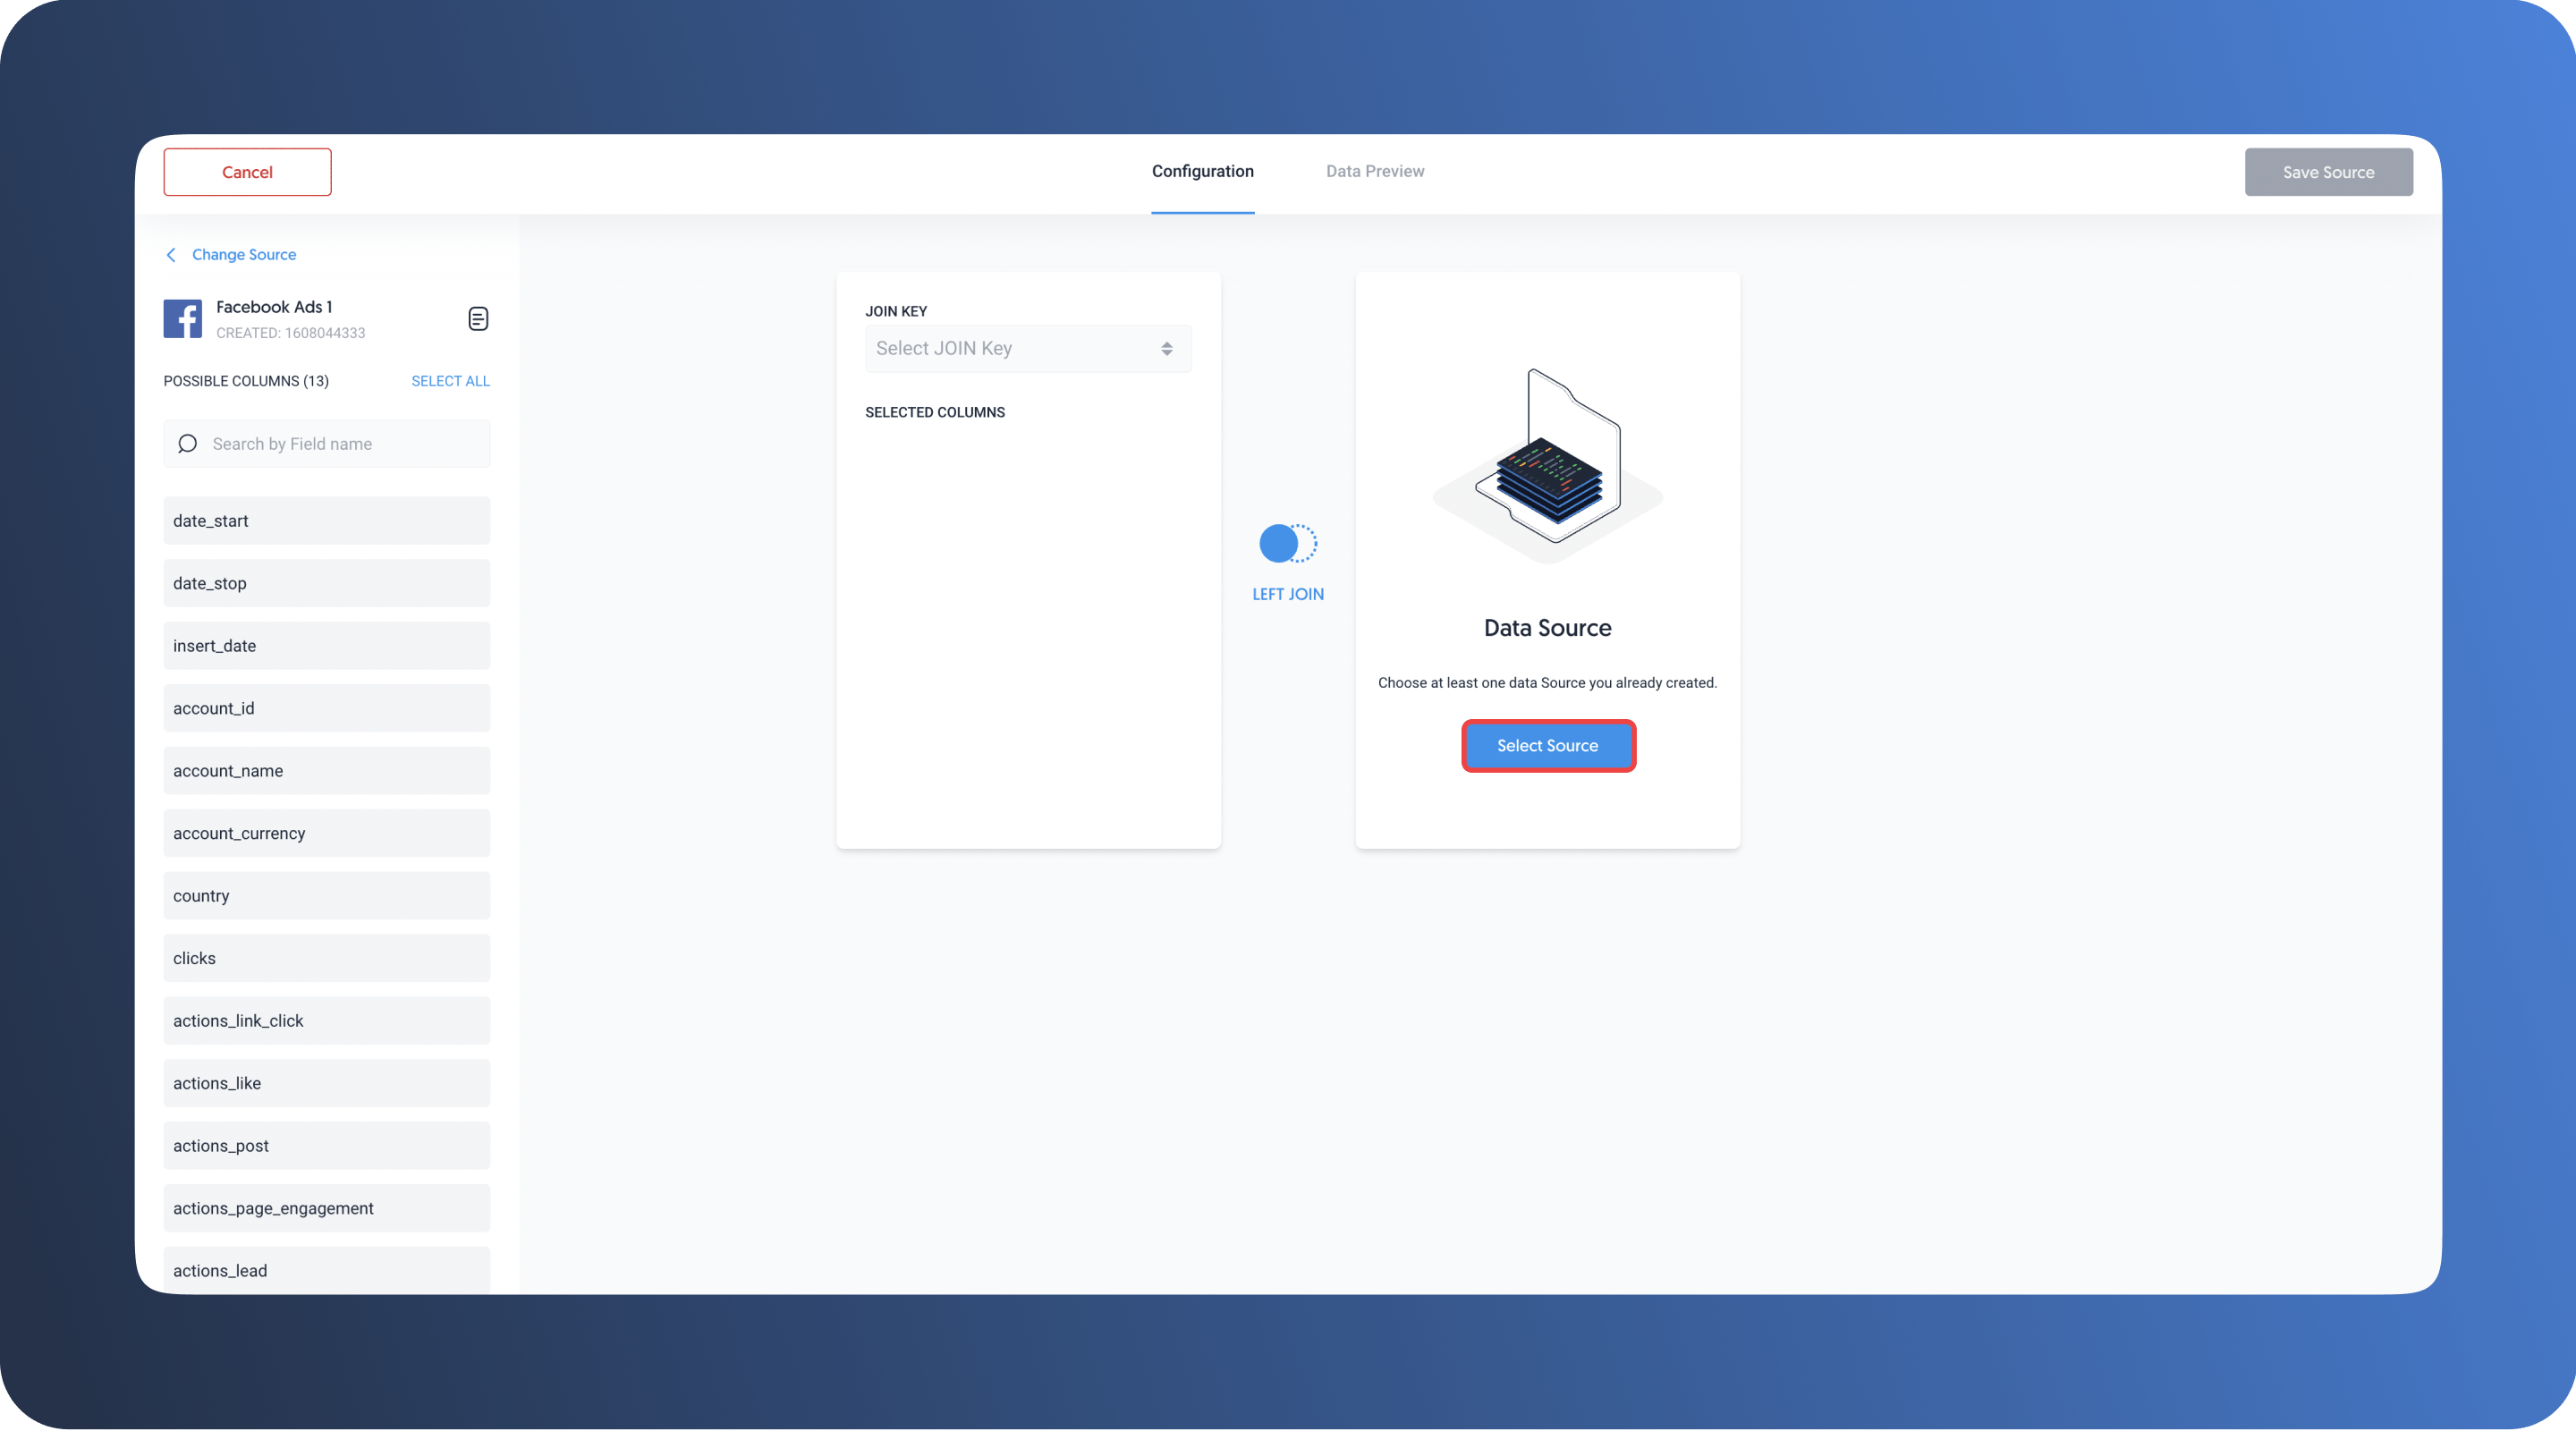
Step 6. Choose a Join Key that is the same for both sources. Dataddo will blend the datasets based on this particular key.
You can select other columns for each source by dragging the fields from the list on the left or right. The columns do not need to be the same for each source.
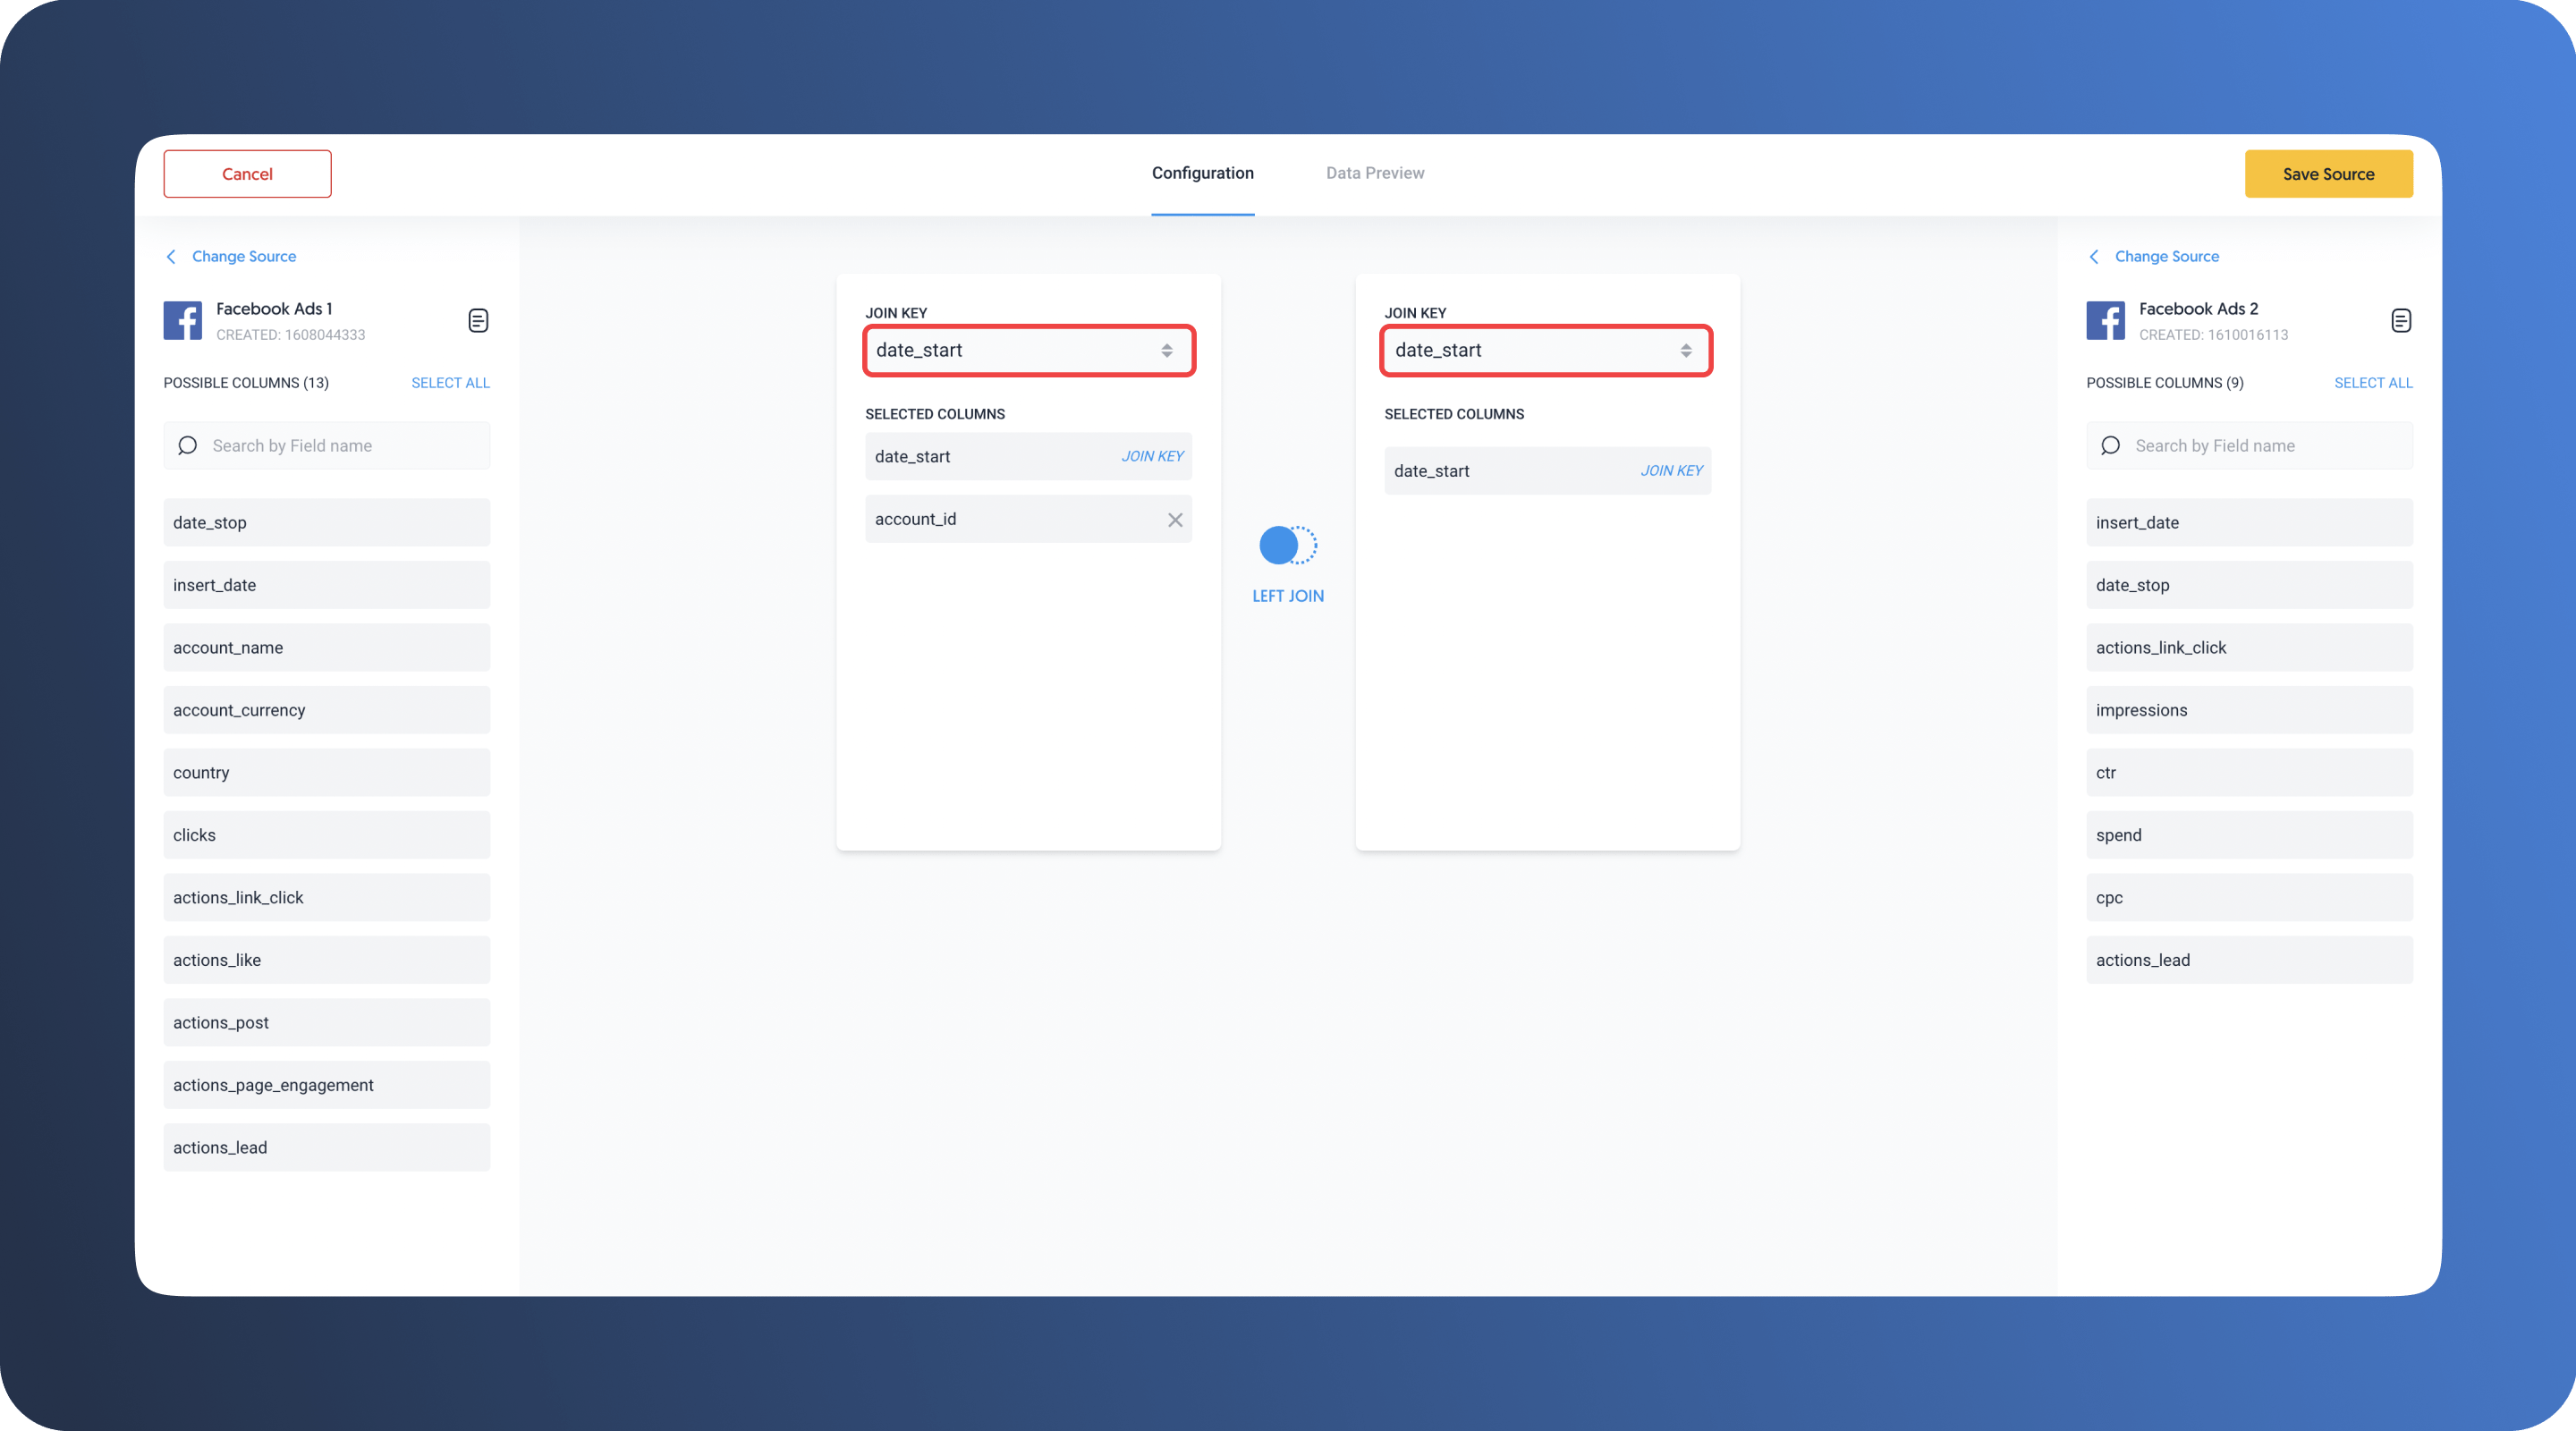
Step 7. Click on the button between the sources to configure the joining type. By default, Left Join is selected.
- Left Join - records from the right source will be joined to the left dataset.
- Right Join - records from the left source will be joined to the right dataset.
- Inner Join - returns only records whose values match in both column sources.

Step 8. Click on Save Source.
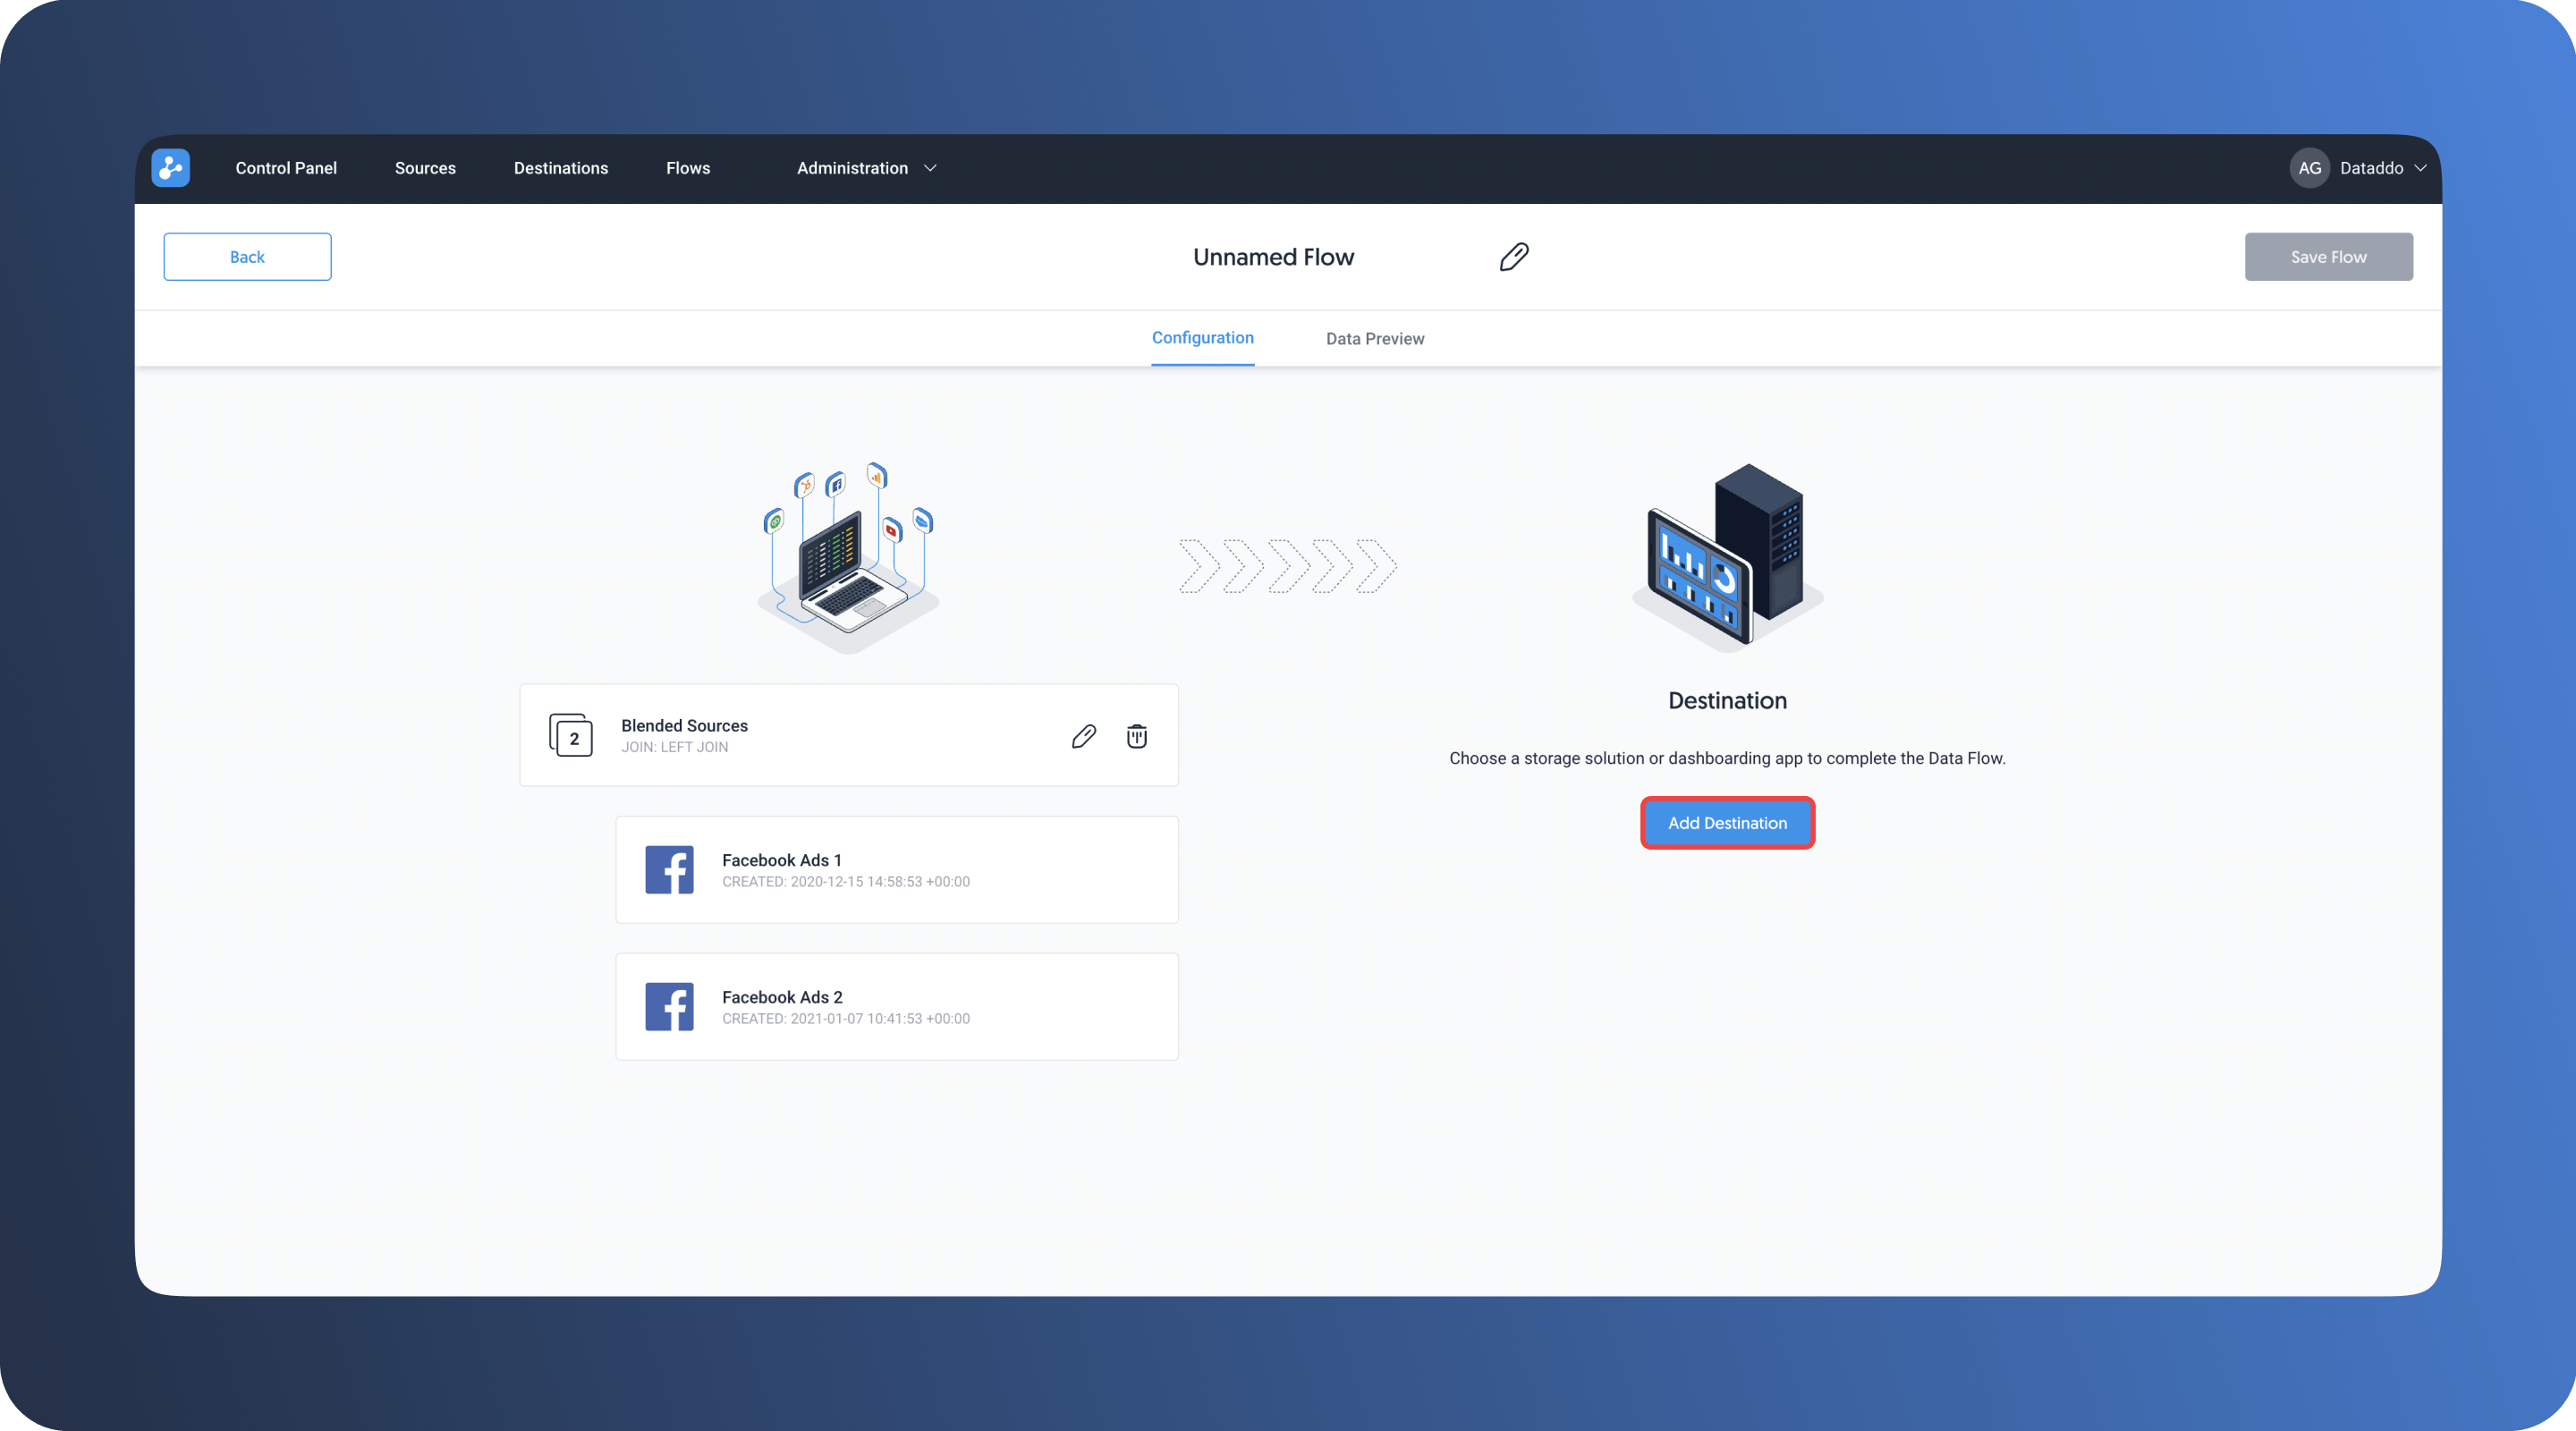
Step 9. Once the data is configured for blending, you can Add Destination.
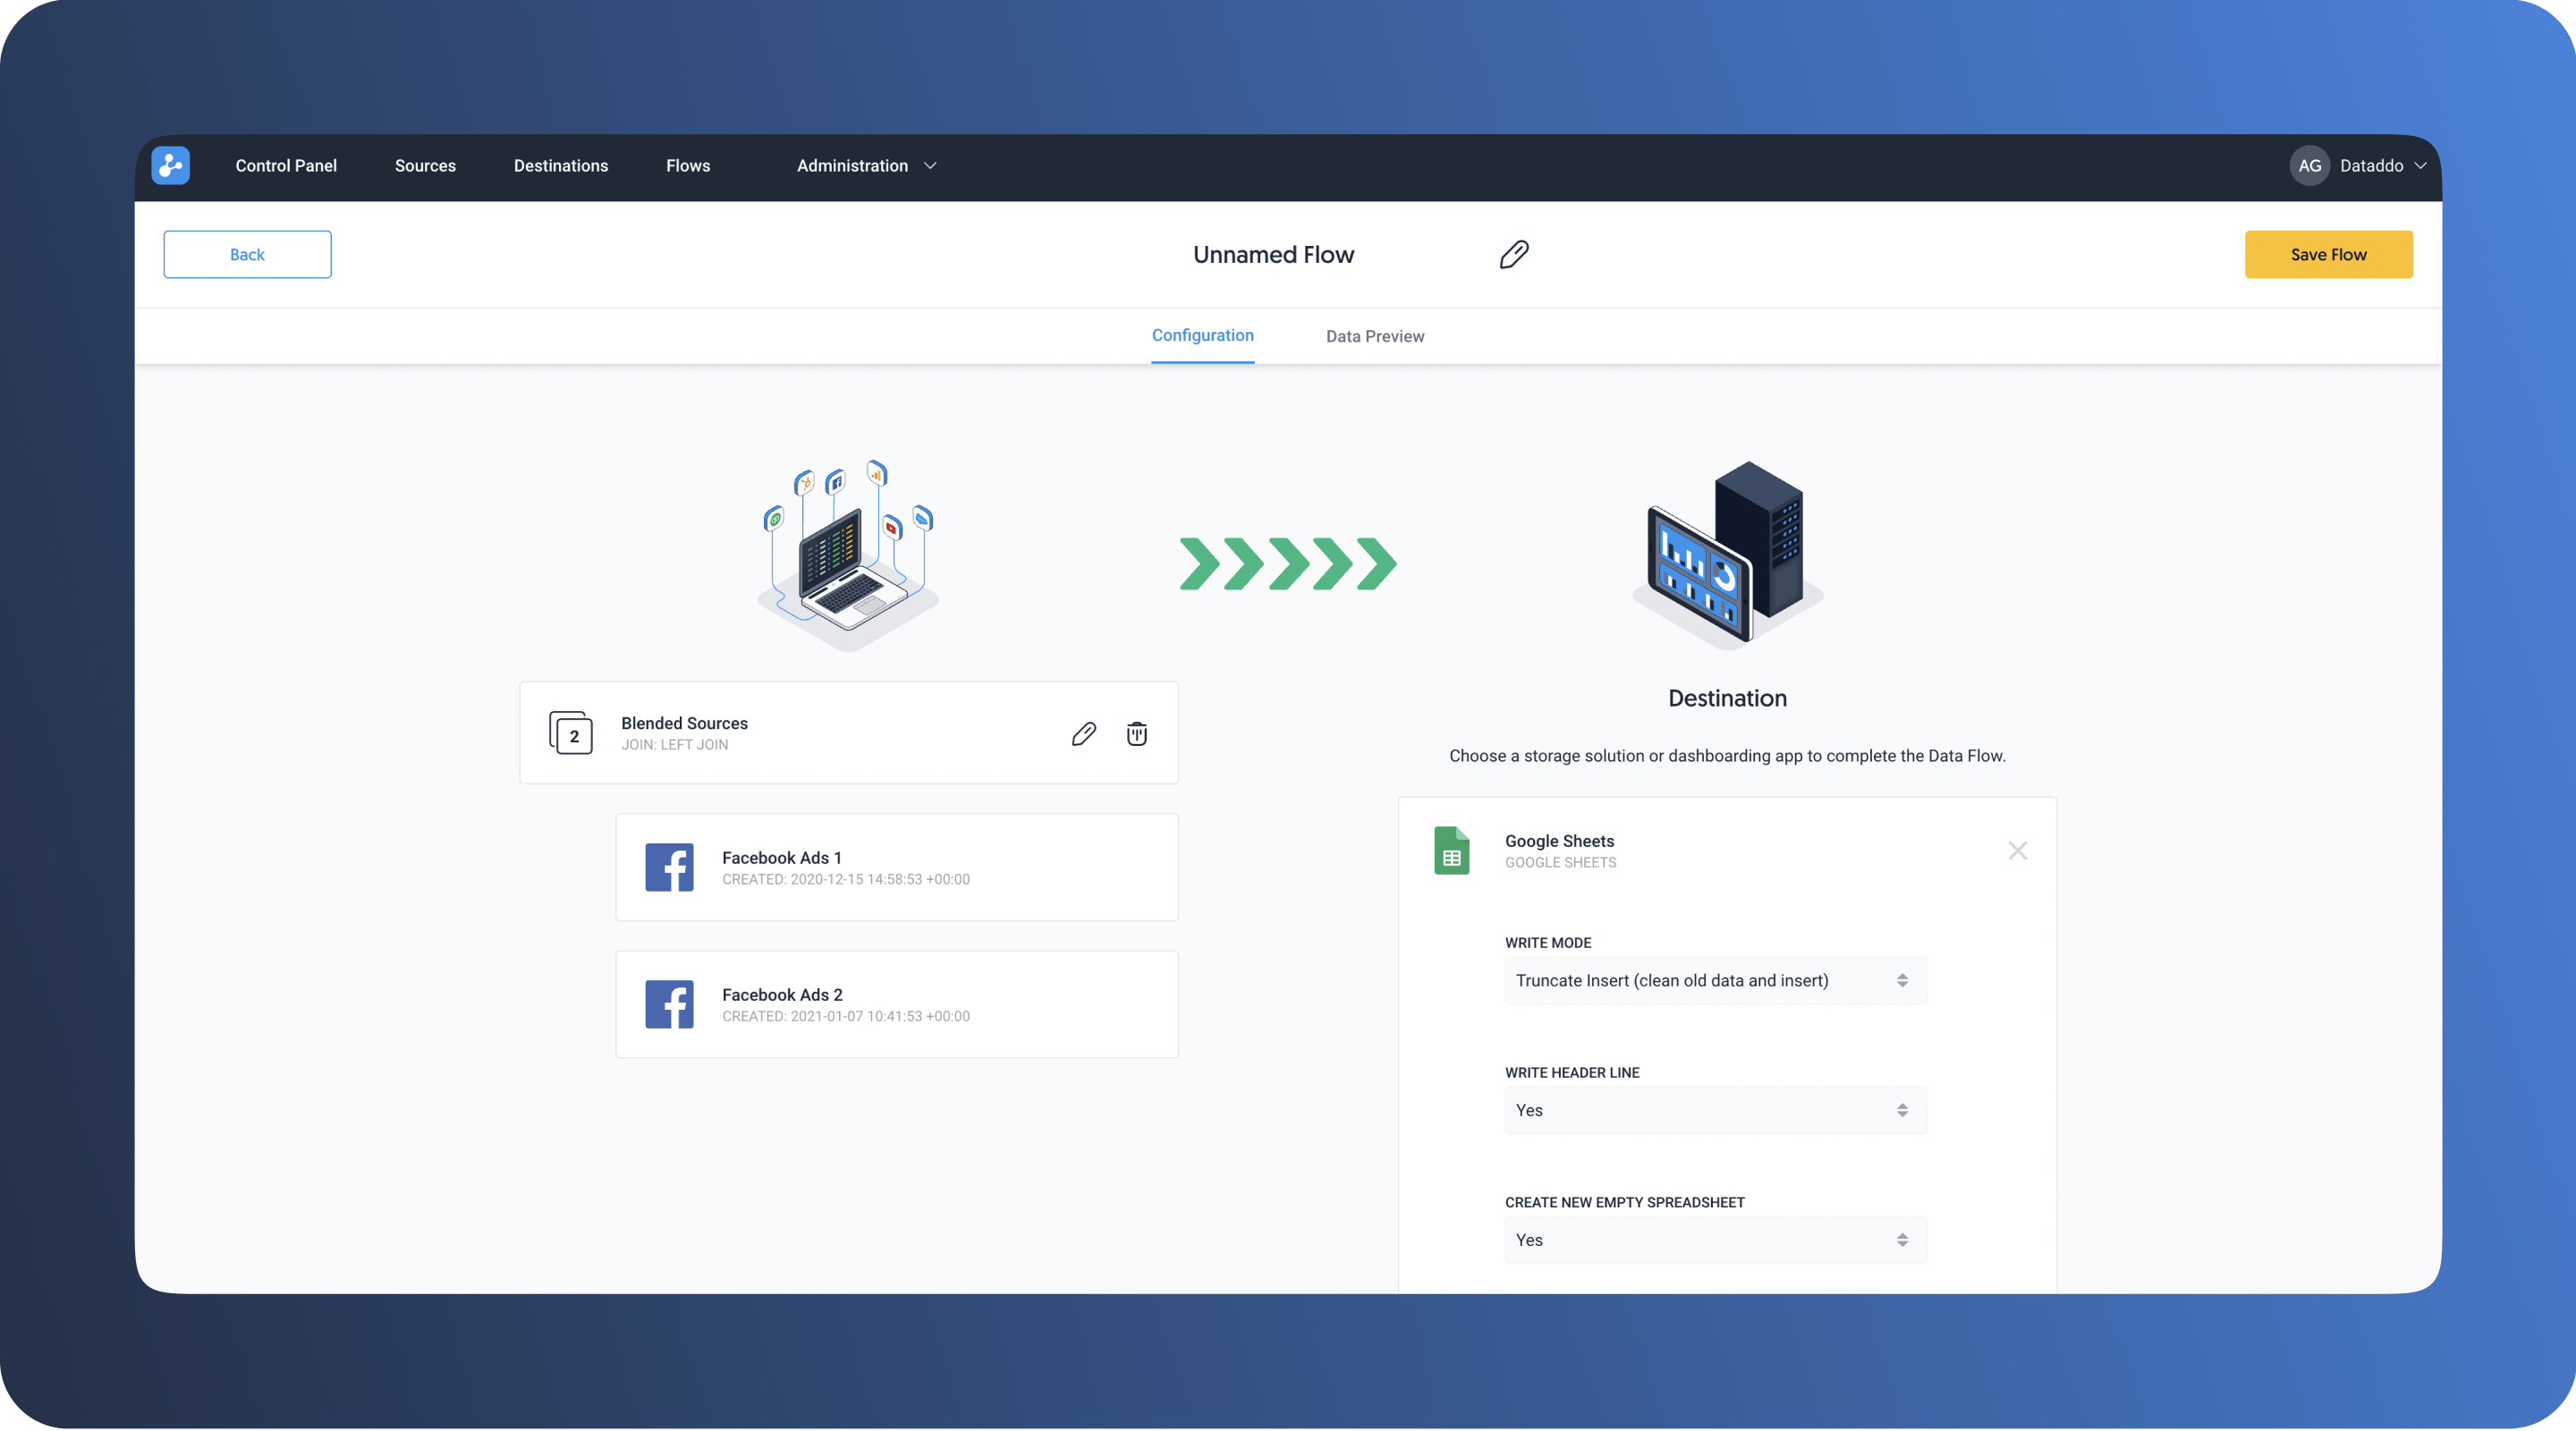
To set up the destination, choose the write mode and other necessary settings. You can also name the flow at the top.
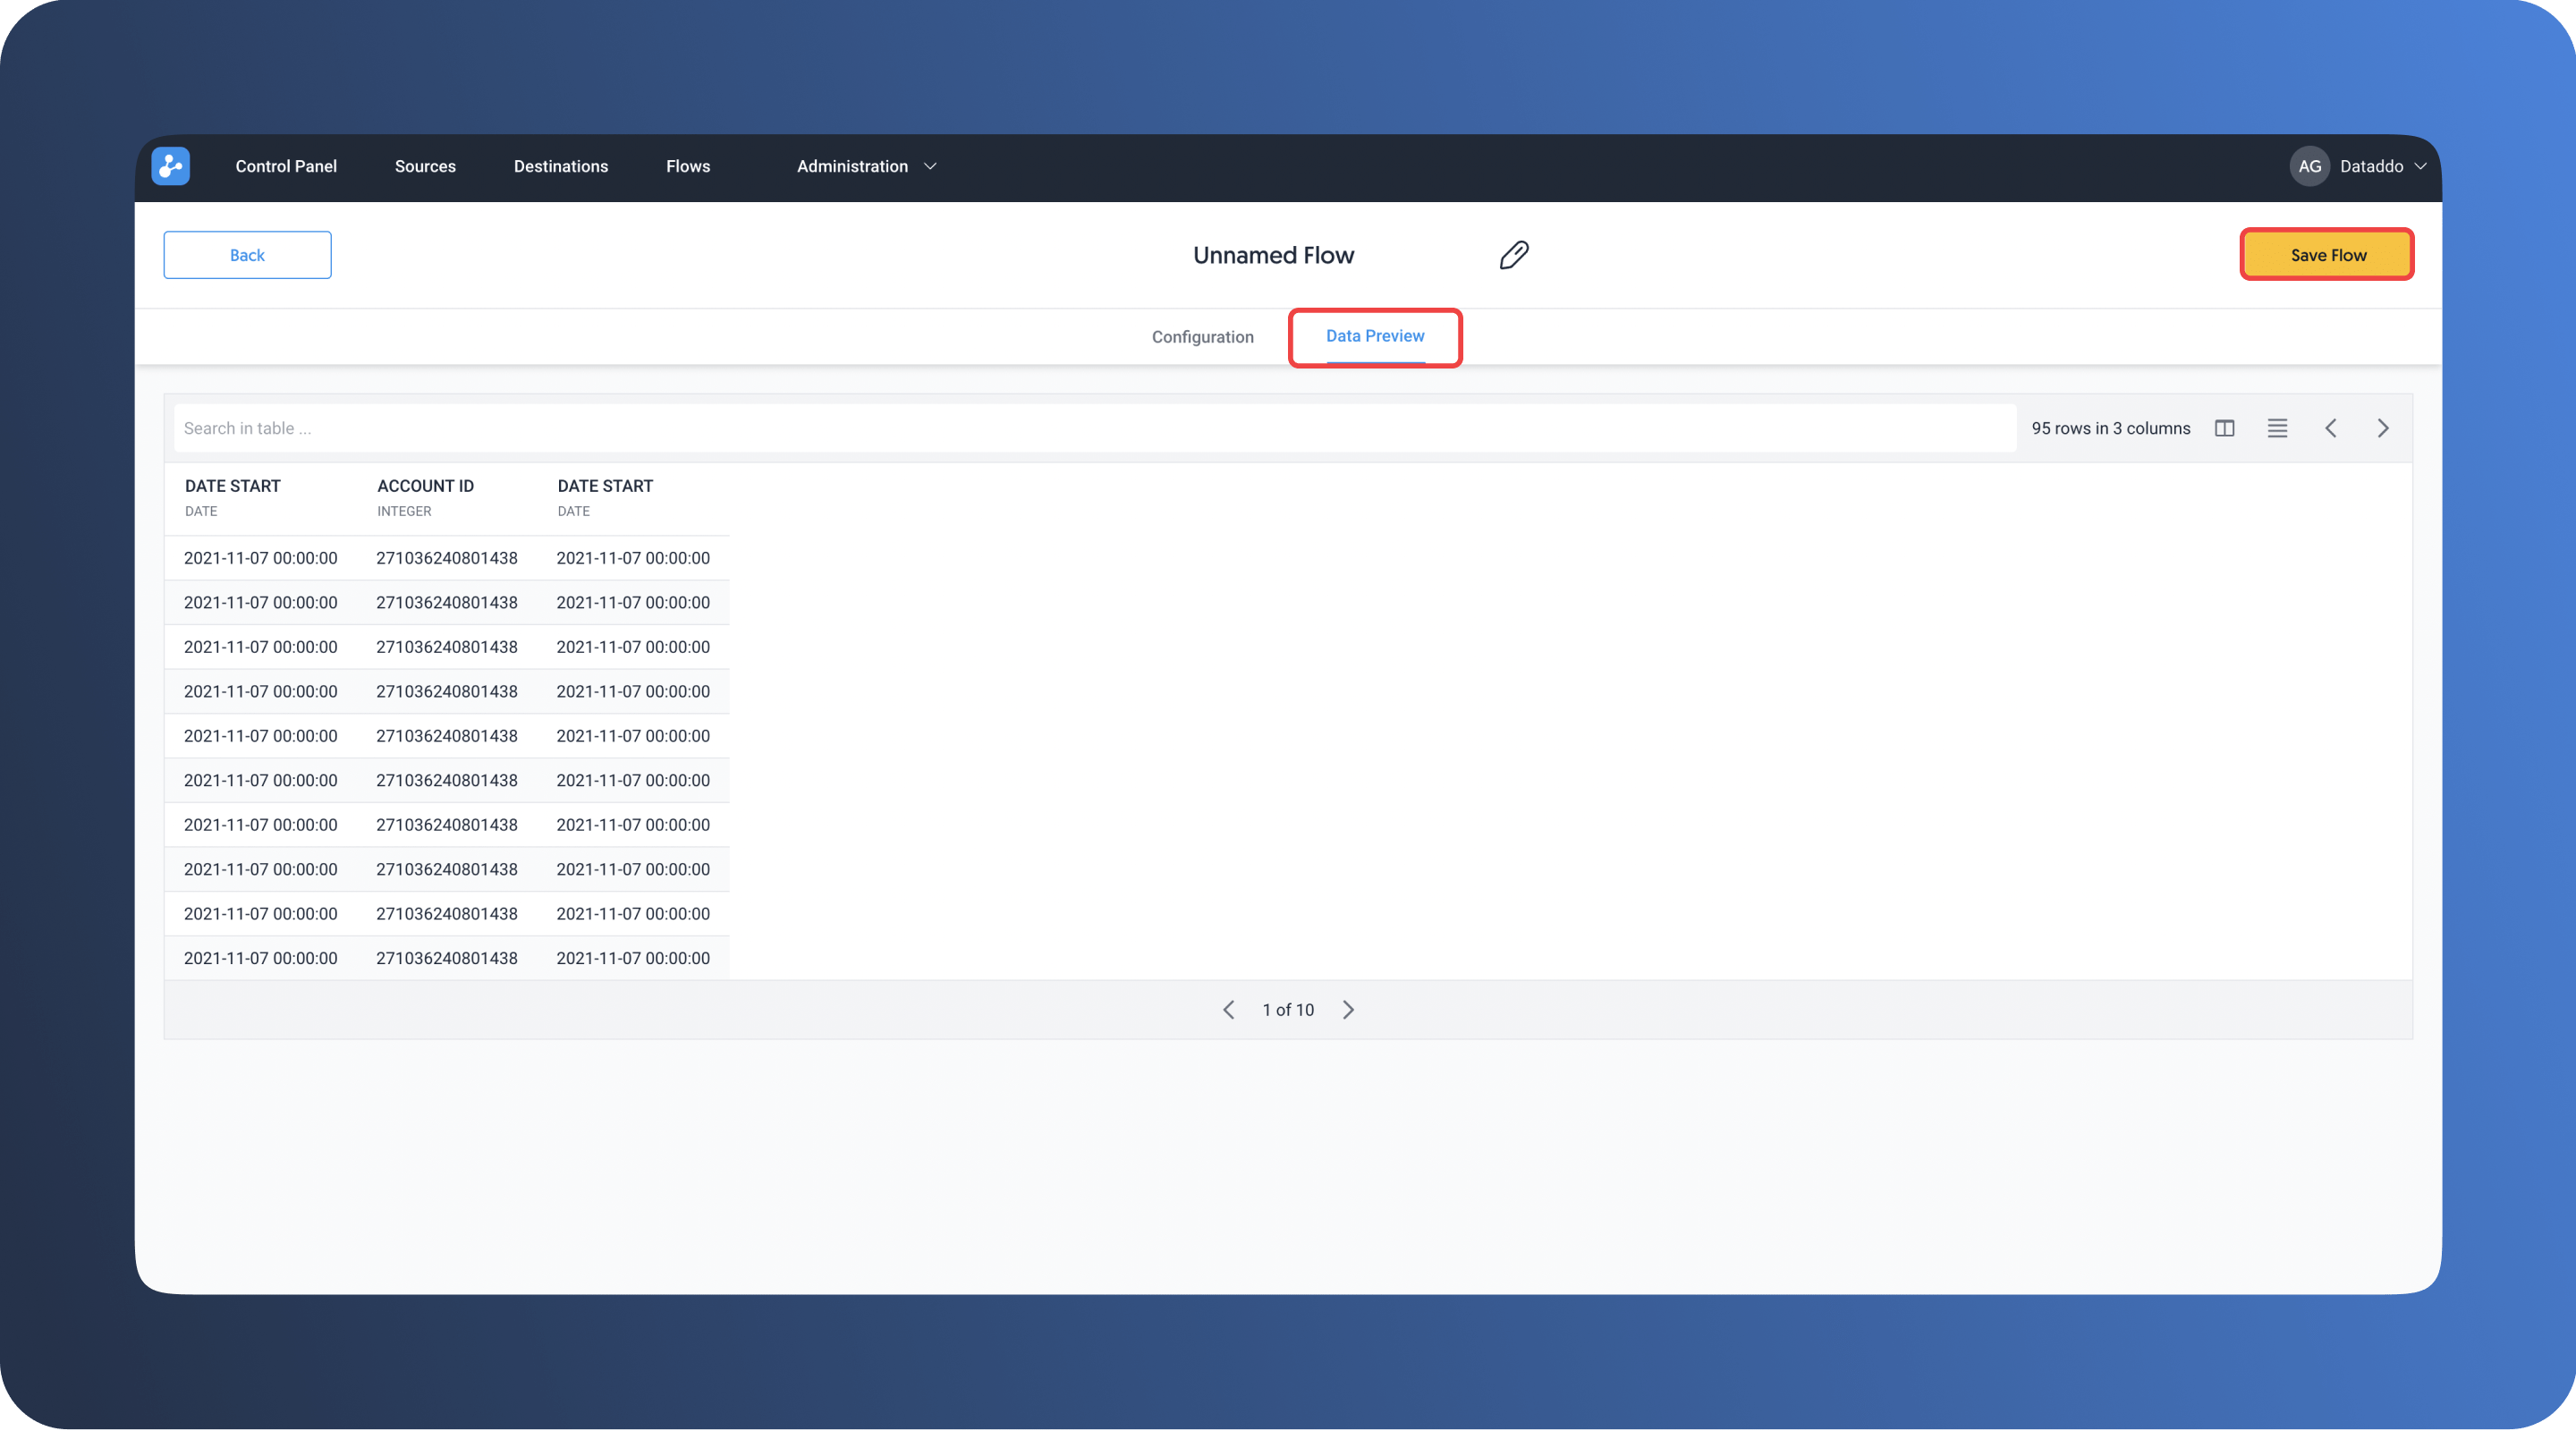
Step 10. By clicking on Data Preview, you can check what data will be sent to the destination. The preview has a limit of approximately 100 rows. Click on Save Flow.
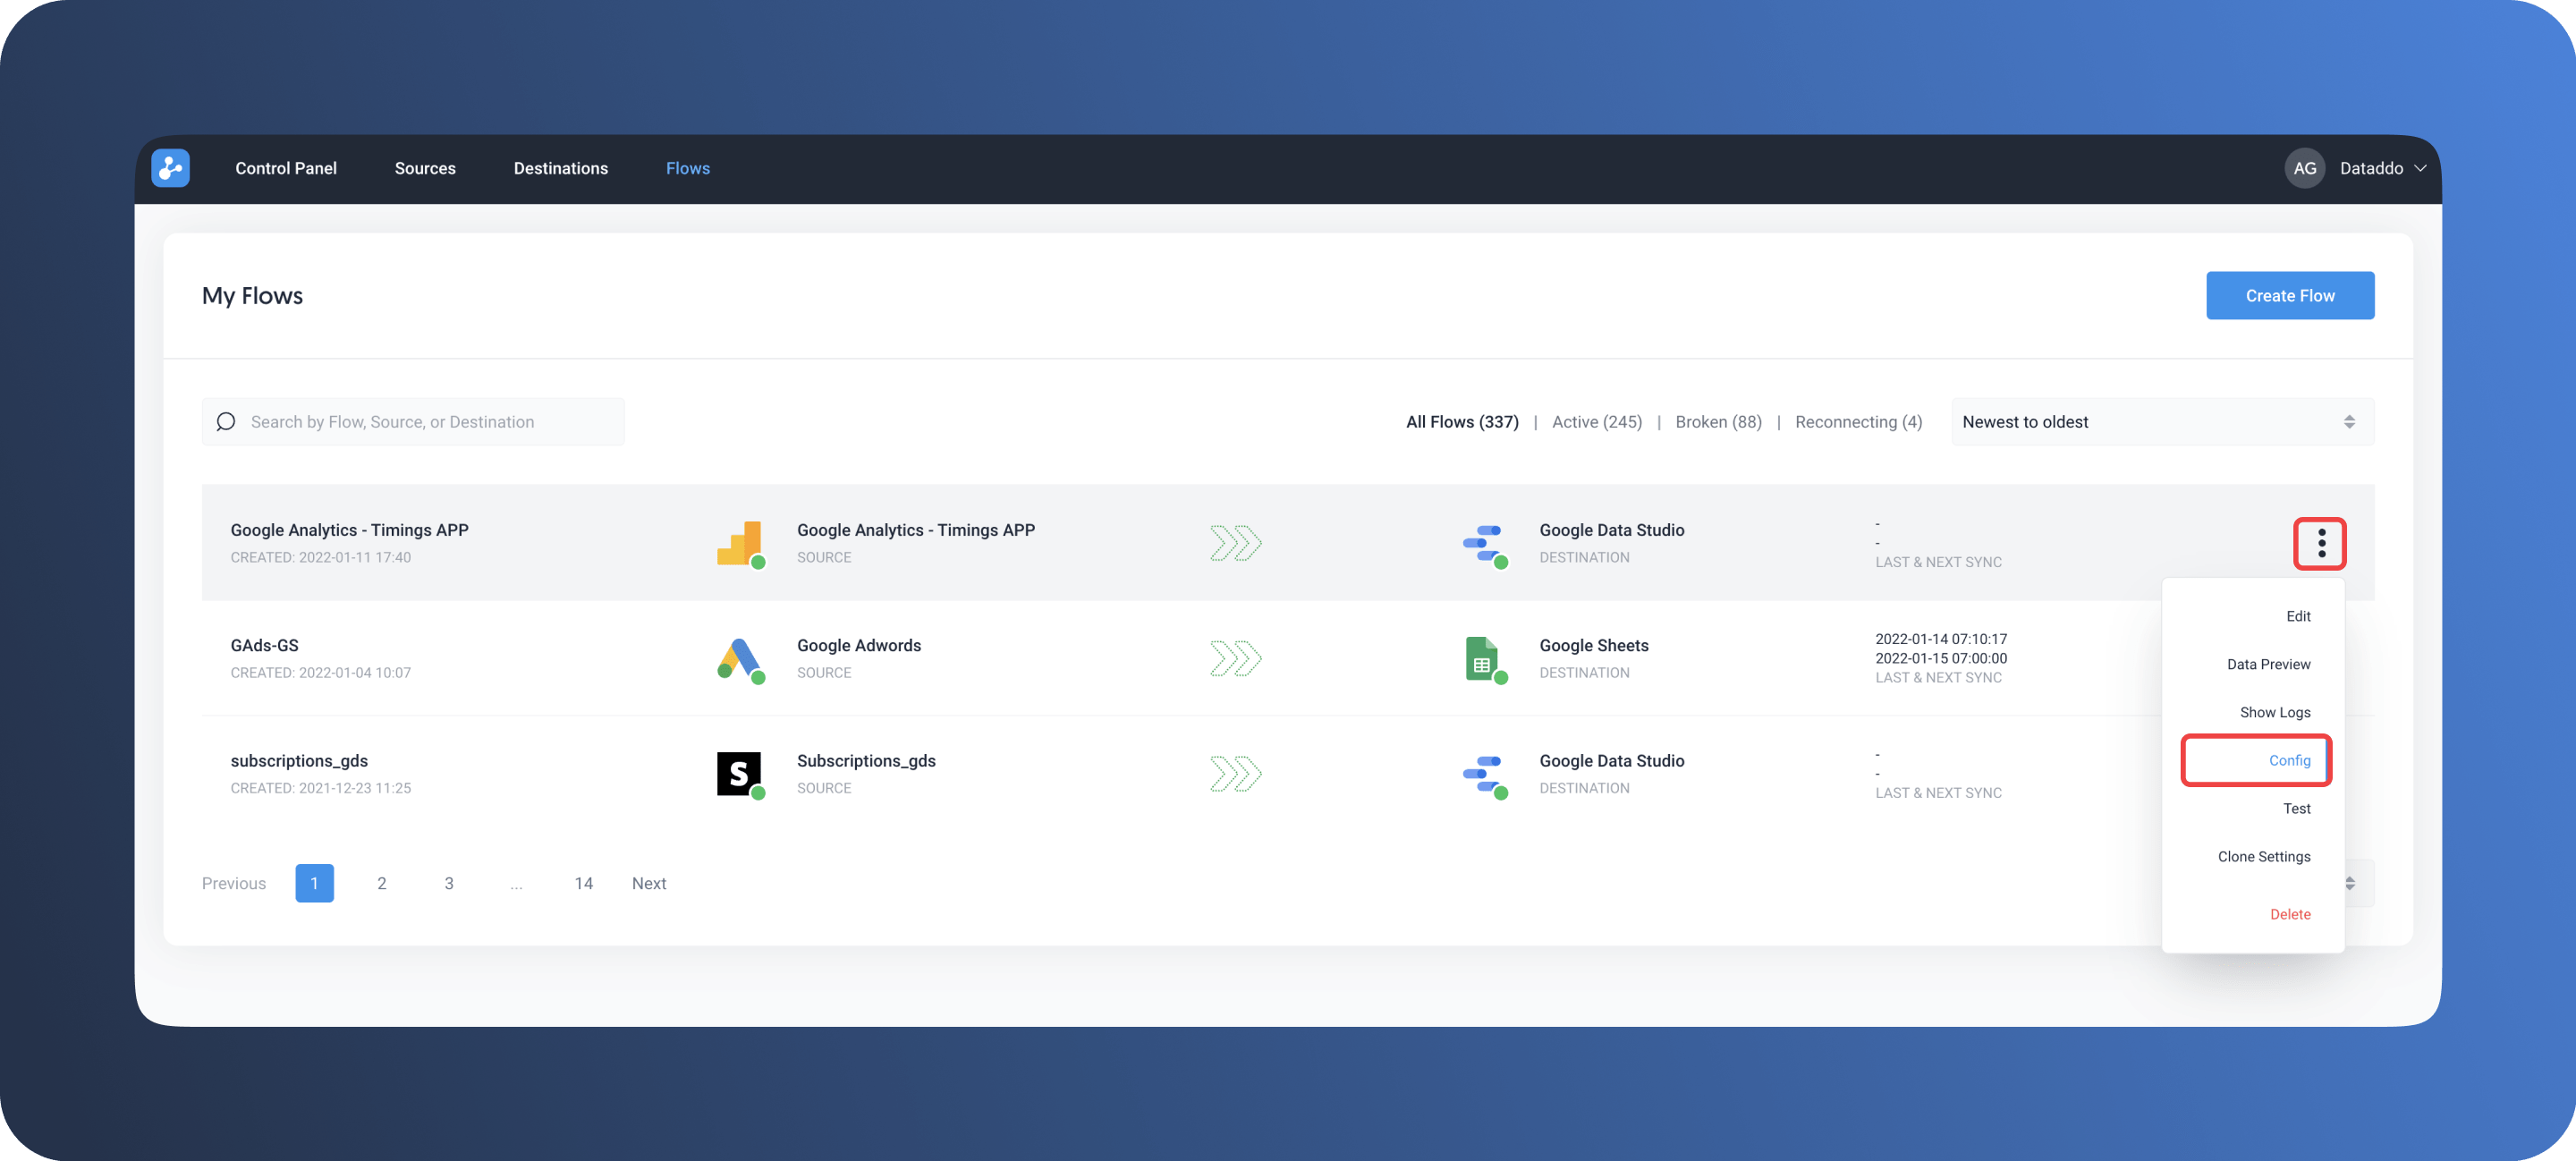
Step 11. Under the Flows tab, click Config and copy the API key and API endpoint ID into Looker Studio to complete synchronization.
The above functionality is important because it enables any business professional to overcome the blending limitations of Looker Studio.
|
See how Dataddo can help your business In just a few quick steps, get your data to Looker Studio or any other dashboarding app.
|


Comments