

Google Analytics 4 has been widely available since October 2020 and is now the default recommendation when creating any new Google Analytics property. There are dozens of amazing guides out there on how to set up a GA4 property, but our favorite is the comprehensive guide by Himanshu Sharma.
6 Months Old, but Still New
GA4 might be 6 months old (as of April 2021) but in reality, it’s still new and going through improvements and enhancements. The API is even newer, with persistent bugs being worked out every day. At the moment, the recommended approach is to set up your GA4 property while running your UA property in parallel.
If you installed Universal Analytics when it first launched in 2012, you can view your website reports from up to 8 years ago. However, data in GA4 expires after 14 months. Unless you’ll never have a need to use data from more than 2 years ago, you have to store your GA4 data in a data warehouse.
Direct Connection from GA4 to BigQuery is Limited
Both being products within their company, Google offers a direct connection between GA4 and BigQuery. However, this native connector isn’t all it’s cracked up to be. With completely different schemas between GA4 and UA, it may be more trouble than it’s worth to completely remap your GA4 data before moving it to BigQuery. You can find all the schema differences in Google Analytics’ developer documentation.
Quick & Powerful: Dataddo Connects GA4 to Any Destination
Dataddo’s no-code platform enables you to connect GA4 to your preferred data warehouse or BI tool with a few clicks.
With Dataddo, you can:
- Choose the dimensions and metrics you want to integrate
- Choose the destination (data warehouse or BI tool) for your data
- Connect other marketing, sales, CRM and financial data to the same warehouse or BI tool
Here’s a step-by-step guide to setting up your GA4 connection with Dataddo:
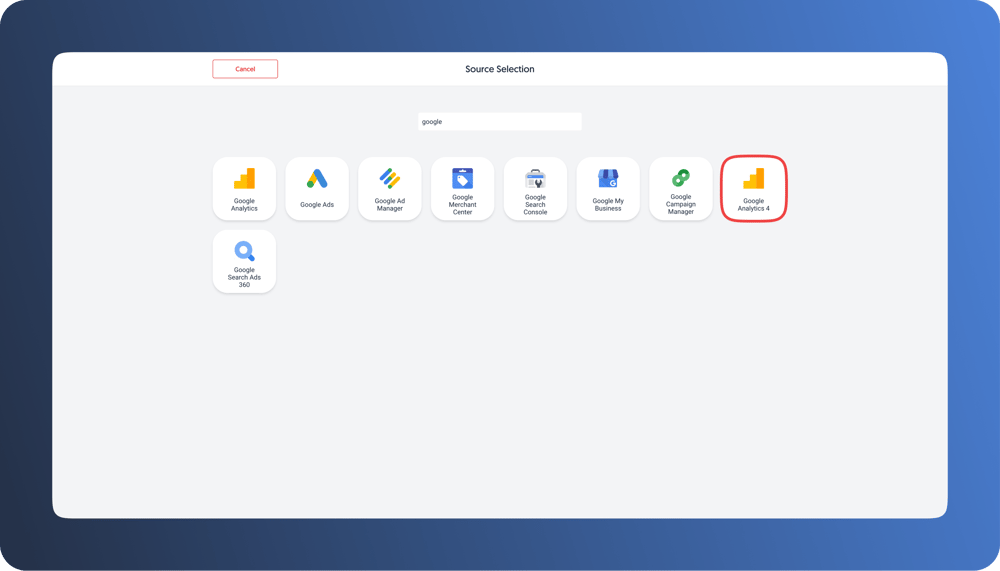
Step 1: Add a new source
In the Dataddo platform, click ‘Create Source’. Search for Google Analytics 4 and select.
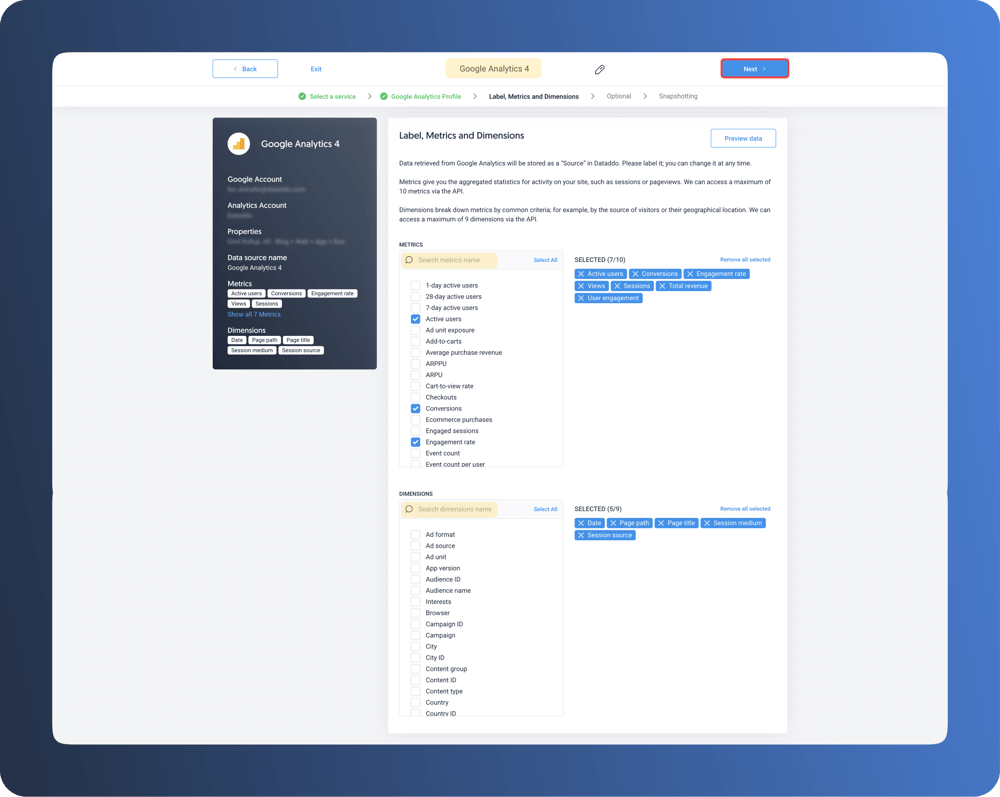
Step 2: Create your source
Authorize your account, then select the Google account, analytics account, and property you would like your data to be pulled from.
On the next page, name your source and select the metrics and dimensions you would like to pull from your selected GA4 account. Please note that due to an API limitation, you may only select up to 10 metrics and up to 9 dimensions.
Should you require more metrics or dimensions, simply create another source. Data blending is available to combine the two sources into one table before loading to your destination.
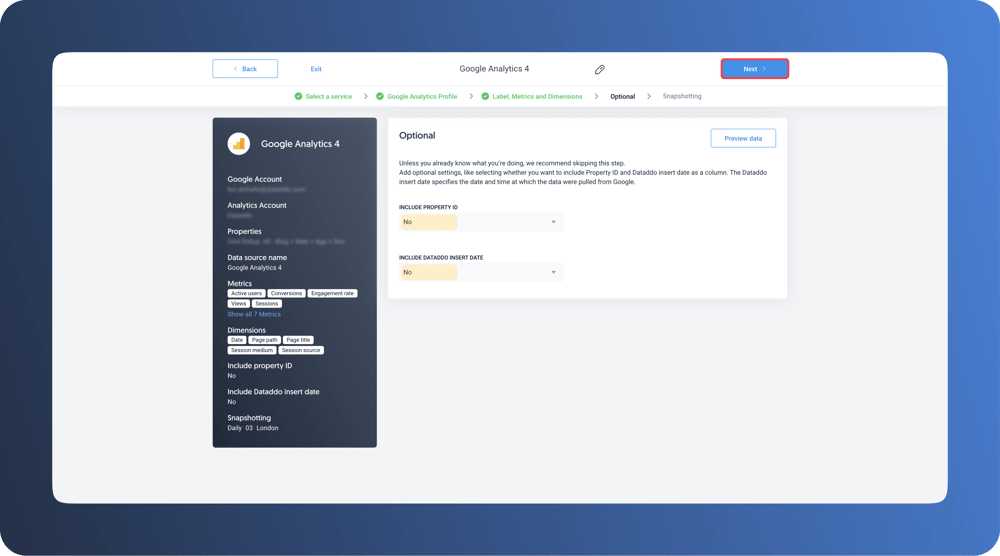
Once your metrics and dimensions are selected, you can choose whether you want to include the property ID and/or the date the data was uploaded to Dataddo. Both of these fields are entirely optional.
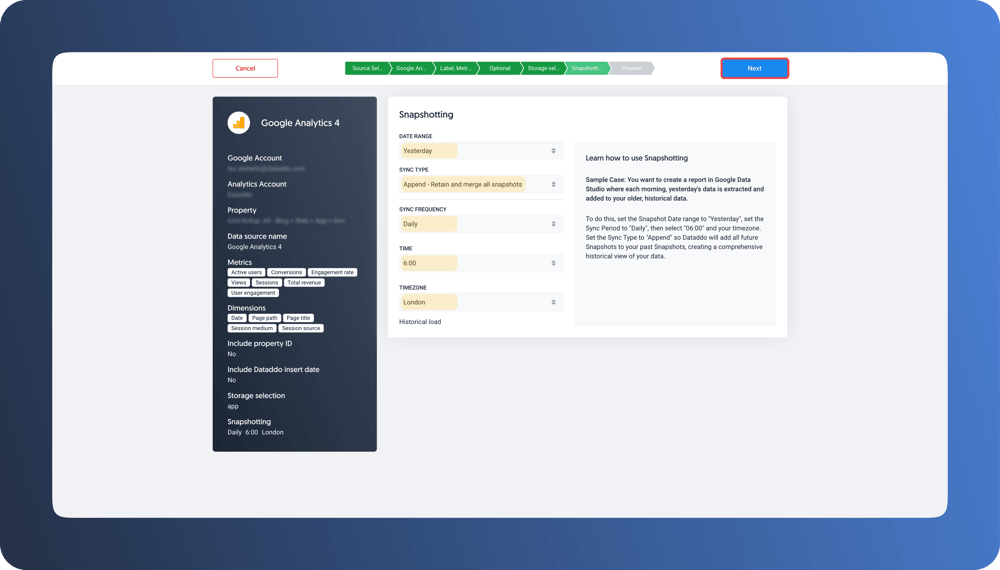
The final step in creating your source is selecting your snapshotting preferences. This will allow you to choose how often your data is pulled from GA4 and how that data is saved. Select when you want new data to be refreshed in your destination.
Step 3: Connecting GA4 to Your Data Warehouse
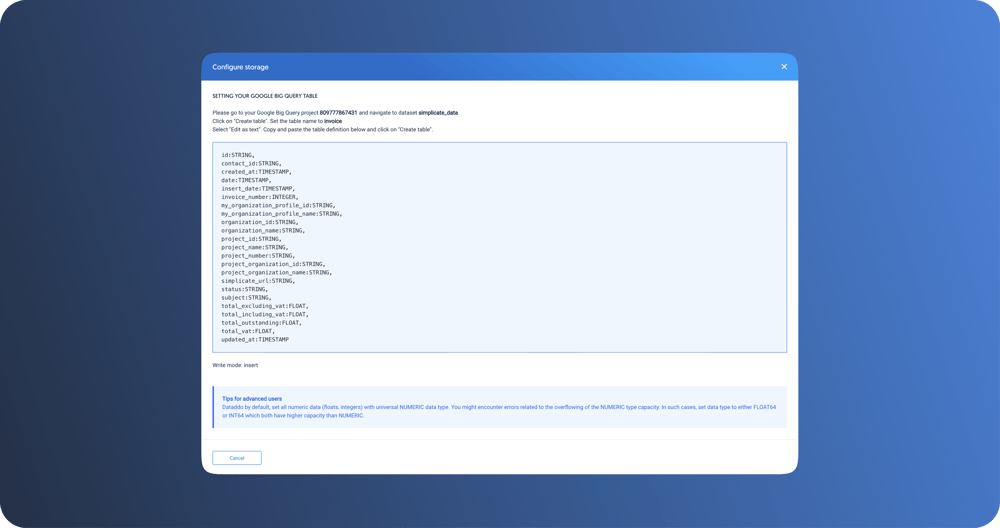
Now that your source is created, connect it to your destination by creating a flow. Select your destination from the list or create a new destination. When connecting to a data warehouse, you will need to configure the connection by authorizing your account.
If you are connecting to a warehouse, you will be given a set of steps to complete the connection within your destination. Here is an example of what that looks like in connecting to Google BigQuery:
Alternate Step 3: Connect GA4 to Your BI Tool
If you’re not using a data warehouse, you can also use Dataddo to directly connect GA4 to your preferred BI tool such as Data Studio, Power BI, Tableau, and others.
Back to Step 2, select “Dashboard” when choosing the destination for your Snapshotting Preferences and follow the prompts to finish creating your Source.
Now that your source is created, connect it to your destination by creating a flow. Select your destination from the list or create a new destination.
When connecting to a dashboard, follow the steps given in the next screen to input the API key and the API endpoint ID. Keep in mind, these steps will vary depending on the BI tool.
Here is an example of what that looks like when connecting to Google Data Studio: 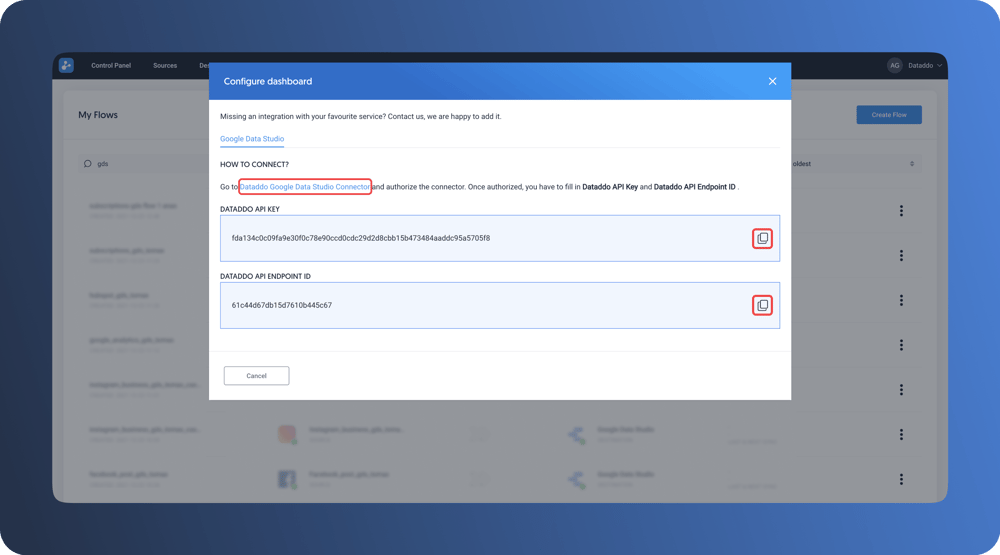
Once your configuration has been completed, your GA4 data will flow to your destination at the time increments previously set during source creation.
Everything you need for GA4
Whether you have just started using GA4 or have already been using it for months, Dataddo’s GA4 connector is designed for your ease and success. Follow the steps above to connect GA4 with your destination, or reach out to our support team for a little extra help and guidance.
Not using Dataddo yet? Sign up for a 14-day free trial to experience it for yourself, and make interacting with your data just that much easier.
|
Connect GA4 to Any Destination Just a few quick steps to get your data to your dashboard for better analysis, without the hassle.
|


Comments